Apache is a widely used HTTP server that is used on most websites to deliver web content. It is one of the earliest HTTP server software and considered the dominant HTTP server globally.
In this guide, we will take orderly steps to learn how to install and configure Apache web server on Ubuntu 24.04 system. We will go further to look at how to create virtual hosts to serve multiple websites with a single installation of Apache. We will conclude the discussions with commands to stop, start, and restart the web server.
Table of Contents
Prerequisites
This guide assumes that you have a Ubuntu server, and you have root or non-root account that is able to install software packages. It is also expected that you are conversant with the command-line interface. Basic knowledge about the Apache HTTP server is essential. If you are new to Apache and or Ubuntu, you can still follow along to install and configure the Apache web server.
Step 1: Update Ubuntu System
Before we install Apache web server on a Ubuntu Linux server, it is recommended to update the software packages index so that we will have latest versions of available packages.
Type and run the following command to update the software packages repositories:
sudo apt updateOptionally, we can choose to upgrade software packages on the system after updating the software packages index. To do this, we will type and execute the following command:
sudo apt upgradeStep 2: Install Apache on Ubuntu
To install Apache on a Ubuntu system, we will type and execute the following command:
sudo apt install apache2After executing the command, wait for the packages and their dependencies to be downloaded for installation. When asked for confirmation, press Y, then on [Enter] key on your keyboard to confirm installation.
Step 3: Verify Apache Status
After installing Apache web server on Ubuntu, we can run a command to check the status of the web server. This is a way to verify that the web server is actually running and ready to receive and respond to web requests.
To check the status of Apache web server, type and execute the following command:
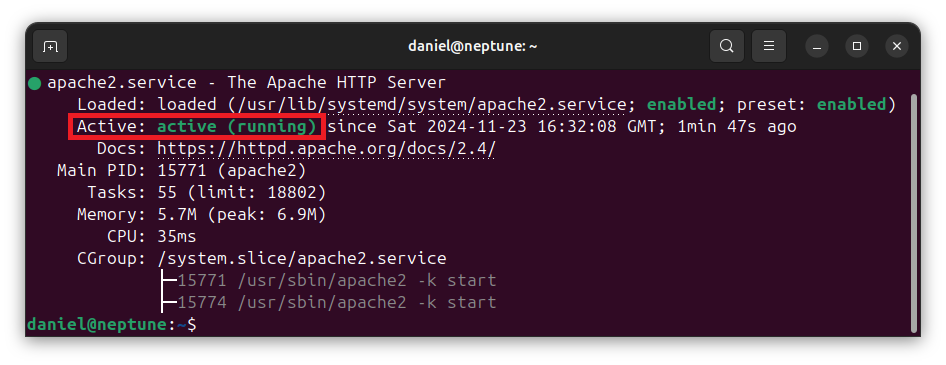
sudo systemctl status apache2You should see that Apache web server is active and running. A sample view of the status of Apache web server is shown in the following image:
Step 4: Auto-Start On Boot
The Apache web server runs as a service on Ubuntu and other Linux systems, receiving and responding to web requests. It is important to ensure that the web server is always active and running.
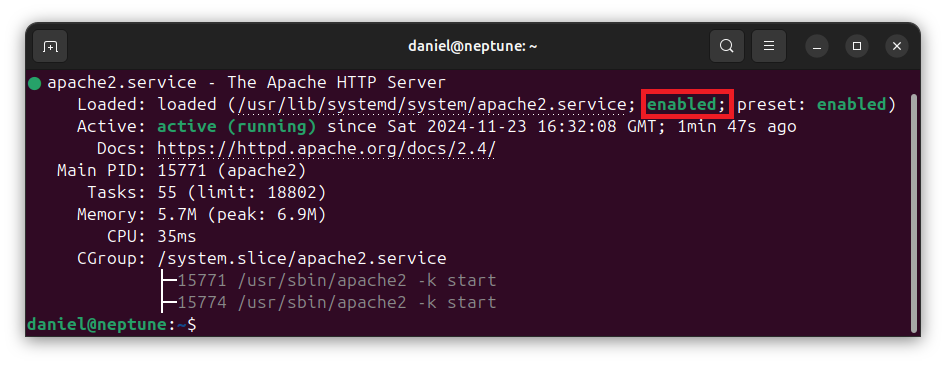
After installing the Apache web server, Ubuntu system automatically sets it to start automatically when the system boots or restarts. However, we can also check to be sure that the web server is set to auto-start on boot. We can get this information from the output of the status command that we executed earlier:
sudo systemctl status apache2The following image shows that the web server is enabled to automatically start on system boot.
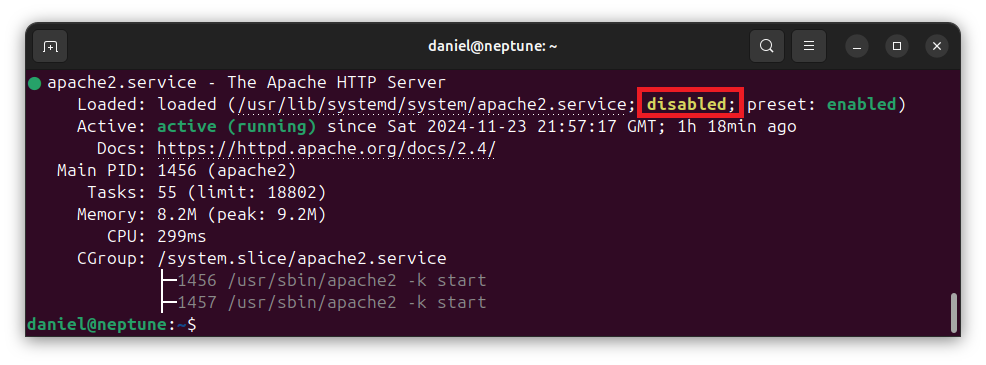
If we do not want Apache web server to start automatically on boot, then we will have to disable auto-start by executing the following command:
sudo systemctl disable apache2After executing the above command, Apache web server will not start automatically on boot. We will need to manually start the web server before it can receive and respond to web requests.
Step 5: Adjust Firewall
With Apache web server installed, we need to adjust ufw firewall so that the web server can receive and respond to web requests. By default, the Apache web server listens on port 80 for HTTP requests and port 443 for HTTPS requests. These ports need to be opened for the web server to be accessible on the Ubuntu system.
If we need to configure the web server to listen to web requests on HTTP port 80, then we will need to type and execute the following command:
sudo ufw allow 80/tcpIf we need to configure the web server to listen to web requests on HTTPS port 443, then we will type and execute the following command:
sudo ufw allow 443/tcpIn the previous two commands, we specified the numeric ports directly: 80/tcp and 443/tcp. But the Apache web server has an alternative way to allow these ports.
When the web server is installed, it registers with the ufw firewall using application profile names for port 80, port 443, and both. Rather than use the numeric port numbers, we can alternatively use the application profile names registered with the firewall to allow these ports.
To see the application profile names that the Apache web server registers with the firewall for the ports, type and execute the following command:
sudo ufw app listThe output should display available application profile names registered with ufw firewall. The following image is a sample view that shows application profiles registered for the web server.

Let’s briefly look at these profile names:
- Apache: This profile allows access to the web server through HTTP port
80only. - Apache Full: This profile allows access to the web server through both HTTP ports
80and443. - Apache Secure: This profile allows access to the web server through HTTP port
443only.
For example, we can allow access to the web server on port 80 only by executing the following command:
sudo ufw allow ApacheTo allow access to the web server on HTTPS port 443 only, we will execute the following command:
sudo ufw allow 'Apache Secure'In the above command, we specified the application profile name in quoted string because it contains a space.
If we need to allow access to the web server through both HTTP port 80 and HTTPS port 443, then we will execute the following command:
sudo ufw allow 'Apache Full'If the ufw firewall is not already enabled, we will need to enable it by executing the following command:
sudo ufw enableWe can check the firewall rules that are currently added by executing the following command:
sudo ufw statusStep 6: Test Apache Web Request
With Apache web server installed and access through the firewall enabled, we can test to confirm that the web server is able to receive and respond to web requests. The web server has a default web document which we can request and see it rendered in the browser window.
If you have IP address linked to your Ubuntu system, then type the following HTTP request URL in the browser’s address bar:
http://IP_ADDRESS
If IP address isn’t available, then we can use localhost to request for the web server’s default page:
http://localhost
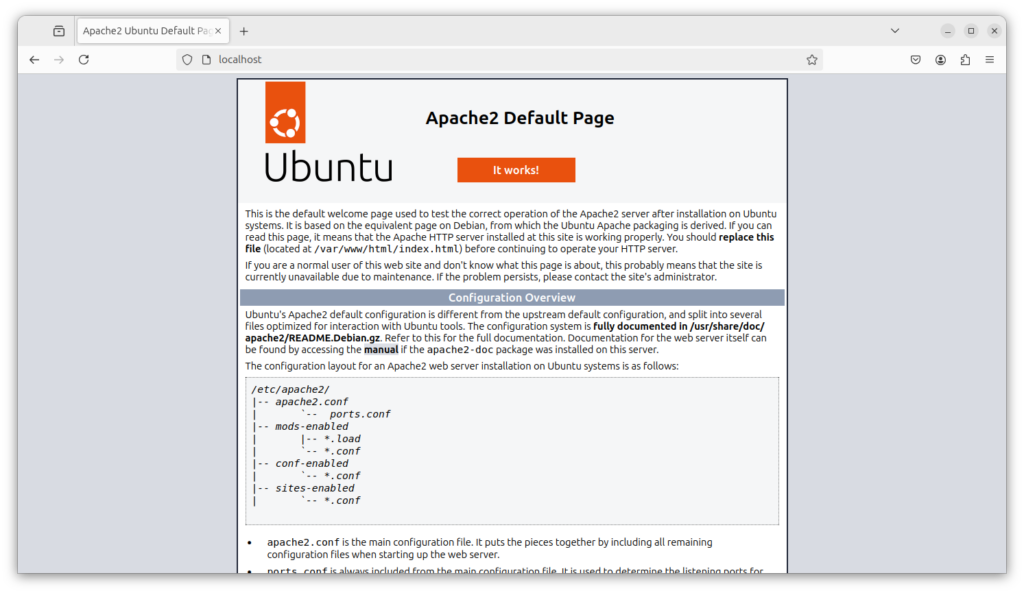
If you see the page above, then congratulations! You have been able to install the Apache web server on Ubuntu and adjusted the firewall to make the web server accessible for web requests. But there are additional things that we can consider.
The discussions that follow consider how to set up virtual hosts to host multiple websites with the single installation of the Apache web server. We also discuss how to manage the Apache server process with commands to stop, start, restart the server.
Setting Up Virtual Hosts
A single installation of the Apache web server can be used to host multiple websites, each with its own domain name for access. For example, we can configure the web server to host example.com, mywebsite.com, and or admin.mywebsite.com. This is made possible by setting up virtual hosts in Apache. If you have used and configured Nginx web server before, then we are referring to server blocks, as discussed in installing and configuring Nginx on Ubuntu 24.04.
A virtual host contains directives that specify the root directory for a website domain It can include other directives on file restrictions, file handling, URL rewriting, etc.
As an example, let’s assume that we have the domain mywebsite.com. We will create a virtual host for this domain in the next discussions. You can choose to replace mywebsite.com with your own domain.
Create Root Directory
As indicated earlier, a virtual host contains the website files for a specific website domain. Thus, to create a virtual host, we will need to specify the root directory which contains the files for the website.
From the command interface, type and execute the following command to create the root directory for our website. You can replace mywebsite with your preferred website directory name.
sudo mkdir /var/www/mywebsiteThe above command creates the directory which will contain our website files. Let’s create an HTML document file in this directory. First, we will navigate to this directory:
cd /var/www/mywebsite
In this example, we will create a single HTML document file in the website directory that we created. To create the file with nano text editor, type and execute the following command:
sudo nano /var/www/mywebsite/index.htmlType the following HTML code in the text editor:
<!doctype html>
<html>
  <head>
    <title>My Website - Home</title>
  </head>
  <body>
    <h1>Welcome to my website</h1>
  </body>
</html>
To save this file in nano text editor, press Ctrl+O, then on [Enter] key to write the content to the file. To exit the editor, press Ctrl+X.
Set Directory Ownership
For security reasons, we will need to set the user of our website directory that we created to the web user account on the system. For Ubuntu, this is the www-data user. To do this, type and execute the following command:
sudo chown -R www-data:www-data /var/www/mywebsiteCreate Virtual Host
We have indicated that a virtual host contains information about a distinct website such as the domain. Other information include the root directory that contains the website files, file restrictions, port number, etc. Since we already have a website directory and file, we can go ahead and create the virtual host directives for our website.
To create a virtual host for our website, we will need to write the directives in a configuration file. Type and execute the following command to create the virtual host configuration file:
sudo nano /etc/apache2/sites-available/mywebsite.confIn the text editor, type the following Apache code. Again, you can replace mywebsite.com with your own domain.
<VirtualHost *:80>
    ServerName mywebsite.com
    ServerAdmin admin@mywebsite.com
    DocumentRoot /var/www/mywebsite
    DirectoryIndex index.html index.htm

    <Directory /var/www/mywebsite>
        AllowOverride All
        Require all granted
    </Directory>
</VirtualHost>
Save and close the text editor. If you are using nano text editor, press Ctrl+O, then on [Enter] key on your keyboard. This will write the code to the file. To exit the editor, press Ctrl+X.
I assume you have basic knowledge of Apache web server configuration. If so, you can skip to enable the website for the virtual host we have created. If you are new to Apache virtual host configuration, then it is important to understand important parts of the configuration above.
<VirtualHost *:80>: This is an opening tag that defines a virtual host configuration. The*:80specification implies that the website will listen to all requests on HTTP port80. If we need the server to listen to HTTPS requests, then we will use port443instead.- ServerName: This specifies the web request domain for which the website will respond. In this example, if a web request is received from
mywebsite.com, then the server will respond. However, if a web request is received fromyourwebsite.com, then this server will not respond. - ServerAdmin: This specifies the email address of the server administrator. Critical errors and other alerts will be sent to this email address
- DocumentRoot: This is the root directory that contains the files for the website.
- DirectoryIndex: This specifies the index document to be served when the domain is accessed without specifying a path or document. For example
http://mywebsite.com/does not path of rile specified. Therefore, Apache will search for the index files that we have specified. The first one that is found will be served to the client. - AllowOverride: Set this to allow
.htaccessfiles to override this configuration file. In this example,.htaccessfiles can overrideAllin the virtual host file. - Require: Allows access to the specified directory, in this case
/var/www/mywebsite.
Enable Website
After creating the virtual host configuration, we need to enable the website. We can do this by executing the following command:
sudo a2ensite mywebsiteThe argument to the a2ensite command is the name of the virtual host configuration file that we created: mywebsite.conf. If you used a different name for the file, then you need to enter the file name, with or without .conf extension, as the argument to the a2ensite command above.
The following command, with the .conf file extension for the file, is also correct:
sudo a2ensite mywebsite.confTest Configuration
After making updates to Apache configurations, such as adding or updating a configuration file, we can test to check for errors. If there are issues in the configuration file, the test will alert us.
To test Apache configurations, we will execute the following command:
sudo apachectl configtestIf there is issue with the virtual host configuration, the web server will alert us. If there is no issue, the test will report that the syntax is OK, as shown in the following image:

Reload Configuration
Before our virtual host configurations can take effect, we will need to reload the Apache web server configurations. To do this, type and execute the following command:
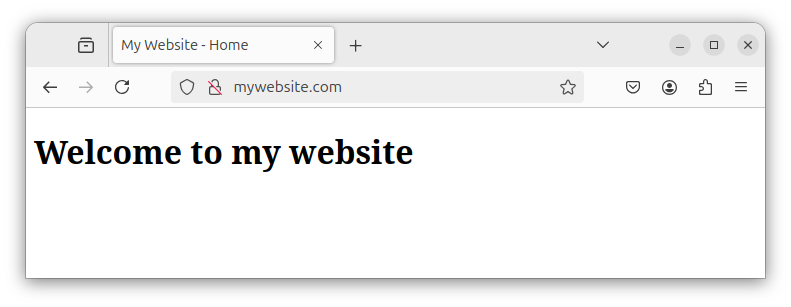
sudo systemctl reload apache2Our website is active now. To see it working, type the domain that we assigned to the virtual server in the browsers address bar. You should see that the index.html file we created is rendered in the browser’s window. A sample view is shown below:
Managing Apache Web Server
There are several commands that we can execute to control the state of the web server. For instance, we can execute commands to start, stop, or restart the web server. We can even execute commands to enable or disable auto-start of the web server on system boot. The following section is a guide to manage the web server status.
Stopping Apache
To stop the Apache web server, we will need to execute the following command:
sudo systemctl stop apache2The above command will stop the web server, and it will no longer be able to receive and respond to web requests.
Starting Apache
If the web server is not running and we need to start it, then we will need to execute the following command:
sudo systemctl start apache2This will start the Apache web server so that it will be able to receive and respond to web requests.
Restarting Apache
Sometimes, we may need to stop the web server and immediately start it again. Usually, we do this after we have performed updates to web server configuration files.
To restart the web server, we will need to execute the following command:
sudo systemctl restart apache2Reloading Configurations
When we perform updates to web server configuration files, the updates may not take effect immediately until the server configuration files are reloaded. We can issue a command for the server configurations to be reloaded without necessarily stopping the web server.
To reload the configuration files without stopping and restarting the web server, we will need to execute the following command:
sudo systemctl restart apache2Enabling Auto-Start on Boot
As a service that is expected to respond to web requests at all times, it is important to set the web server to automatically start on system boot. By doing this, our attention will not be required to start the web server when system boots.
To set the web server to automatically start on boot, we will need to execute the following command:
sudo systemctl enable apache2Disabling Auto-Start on Boot
If we do not want the web server to automatically start on system boot, then we will need to execute the following command:
sudo systemctl disable apache2After executing the above command, the web server will not start automatically when on system boot. In this case, we will need to start the apache web server manually.
Conclusion
Apache is a widely used HTTP server that powers most internet websites. It is considered the dominant HTTP server in use globally. With a single installation, we can configure the web server to host multiple websites by creating virtual hosts. It can also be configured with PHP to serve dynamic website contents.