The Apache web web server is a free and open-source application that is used to serve HTTP content on the internet. It is one of the earliest HTTP web servers still in use today.
PHP-FPM is a FastCGI implementation for the PHP programming language. It runs as a service outside the web server process.
The Apache web server can be configured to communicate with PHP through the FastCGI protocol. When configured, PHP-FPM can receive PHP scripts from the web server, process them, and then send a response back to the web server to be delivered to clients.
In this guide, we will look at how the Apache web server can be configured to communicate with PHP-FPM.
Table of Contents
Getting Started
To get along with the instructions in this guide, you should have a Ubuntu system. In this guide, I assume that you are using Ubuntu 24.04. If you are using a previous version of Ubuntu, the instructions will most likely work for you.
It is expected that you have a user account with privileges to install software packages, and you should be familiar with basic Linux commands.
This guide requires Apache web server, PHP, and PHP-FPM. If you have already installed these packages, then you can quickly jump to the section on configuring Apache web server with PHP-FPM. However, if you are missing any of these packages, you can click on a link from the list below to jump to the appropriate section to install the missing package.
Step 1: Update Packages Index
Before installing software packages on Ubuntu system, it is important to update the software packages index. This refreshes the list of available packages to their latest versions.
Type and execute the following command to update software package index:
sudo apt updateOptionally, you may upgrade installed packages to their latest versions by executing the following command:
sudo apt upgradeStep 2: Install Apache
The Apache web server is available in the default Ubuntu repository. To install it, type and execute the following command:
sudo apt install apache2By default, the Apache web server listens on port 80 for HTTP requests and port 443 for HTTPS requests. To be able to receive web requests, we will need to open these ports with ufw firewall.
To allow the web server to receive web requests through HTTP port 80, type and execute the following command:
sudo ufw allow 80/tcpTo allow the web server to receive web requests through HTTPS port 443, type and execute the following command:
sudo ufw allow 443/tcpIf the ufw firewall is not active, you will need to activate it so that only opened ports can be used. Type and execute the following command to activate ufw firewall:
sudo ufw enableThe Apache web server runs as a service, and it is important to ensure that the web server is automatically started on system boot. Usually, this is enabled by default. you can however execute the following command to enable it.
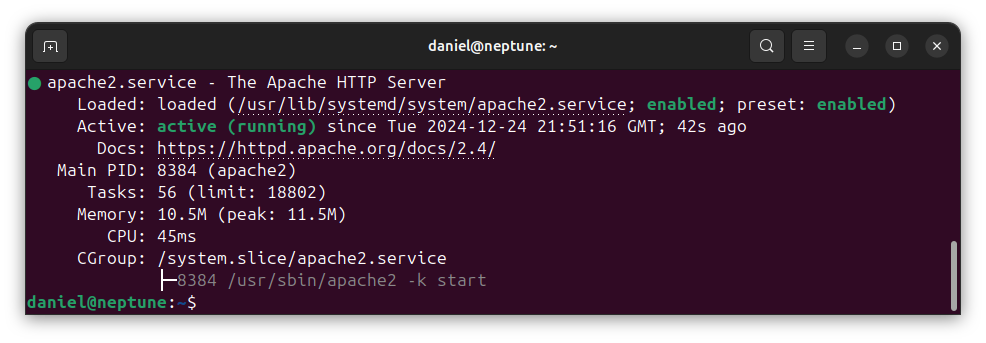
sudo systemctl enable apache2To check the status of the web server, type and execute the following command:
sudo systemctl status apache2The following is a sample output from the above command.

Step 3: Install PHP
With a single command, we can install PHP from the default Ubuntu repository. However, the version of PHP in the default Ubuntu repository may not be the latest. We can install the latest version of PHP by adding a repository that has it. At the time of writing, PHP 8.4 is the latest release.
Ondrej Sury’s repository is a very popular Ubuntu repository that has PHP 8.4 available for installation. We will need to add this repository so that we will be able to install the latest PHP release.
From the command interface, type and execute the following command:
sudo add-apt-repository ppa:ondrej/phpAfter adding the new repository, type and execute the following command to update the list of available packages:
sudo apt updateRun the following command to install PHP 8.4:
sudo apt install php8.4Observe that we specified the PHP version number in this command. If we omit the version number, the default PHP version that ships with the Ubuntu system will be installed. For Ubuntu 24.04, that is PHP 8.3. Since we intend to install PHP 8.4, we had to be specific in the command.
You can check to verify that PHP is installed by running the following command:
php -vThis will output the version of PHP that is installed and currently active. A sample view is shown below:

Step 4: Install PHP-FPM
PHP-FPM is a FastCGI implementation for the PHP programming language. It is designed to create a pool of processes that handle requests simultaneously. This increases the performance of PHP applications.
PHP-FPM is provided as an extension to the core PHP and therefore has to be installed separately. Since you installed PHP 8.4, you need to install its matching version, php8.4-fpm. Type and execute the following command to install it:
sudo apt install php8.4-fpmAgain, we have been specific with the version of PHP-FPM in this command. If you have a different version of PHP than what you installed in this guide, then you will have to replace the version number in the command, 8.4, with the version number of your installed PHP.
PHP-FPM runs as a service, and it is important to ensure that it starts automatically on system boot. Type and execute the following command to enable it:
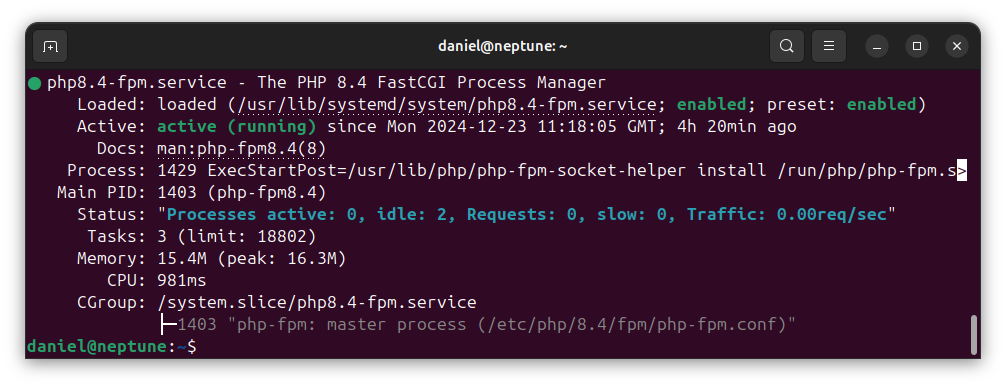
sudo systemctl enable php8.4-fpmYou can run the following command to check the status of php8.4-fpm service:
sudo systemctl status php8.4-fpmA sample output from the above command is shown blow:

Step 5: Configure Apache with PHP-FPM
The Apache web server may initially be configured to use the Prefork Multi-Processing Module (MPM). In this guide, we will configure the web server to use the Event MPM, also referred to as mpm_event_module.
Enable Event MPM
To know the MPM module used by the web server, type and execute the following command:
sudo apachectl -M | grep 'mpm'This will display the MPM that the web server is configured to use. A sample output is shown below:

If your output shows mpm_event_module, then you are good to go. Jump to the section on installing FastCGI module to continue. However, if your output shows mpm_prefork_module or mpm_worker_module, then you need to disable the MPM currently in use, and enable the Event MPM.
If your output shows mpm_prefork_module, type and execute the following command to disable Prefork MPM:
sudo a2dismod mpm_preforkIf you get an error message from the above command, informing you of modules that depend on mpm_prefork, then you will have to disable those modules first before disabling Prefork MPM. For example, the following output shows that mpm_prefork depends on PHP 8.4.

In this case, you will disable PHP 8.4 before disabling Prefork MPM:
sudo a2dismod php8.4Then, disable Prefork MPM:
sudo a2dismod mpm_preforkIf you check the MPM in use, and the output shows mpm_worker_module, type and execute the following command to disable it:
sudo a2dismod mpm_workerYou can now enable the Event MPM by executing the following command:
sudo a2enmod mpm_eventRestart the Apache web server with the following command to activate mpm_event_module:
sudo systemctl restart apache2Install FastCGI Module
To use PHP FastCGI Process Manager (FPM) with the Apache web server, you will need to install the FastCGI module. Type and execute the following command:
sudo apt install lib-apache2-mod-fcgidYou need to enable the configuration for PHP-FPM. Type and execute the following command:
sudo a2enconf php8.4-fpmEnable Proxy Modules
As indicated earlier, PHP-FPM runs as a service, and outside the Apache process. The web server passes PHP scripts to PHP-FPM for processing. In another view, we can think of this as the Apache web server communicating with a proxy. To make this communication possible, we need to enable the web server’s proxy modules.
Type and execute the following command to enable the proxy module:
sudo a2enmod proxySince the proxy communication is between Apache and a FastCGI application, you will also need to enable the FastCGI proxy module:
sudo a2enmod proxy_fcgidStep 6: Test Apache Configuration
It is important to test for errors after making configuration updates. Type and execute the following command to check for possible configuration errors:
sudo apachectl configtestIf no errors are detected in the configuration files, the web server will reply with Syntax OK, as shown below:

Step 7: Test PHP from Web Browser
To confirm that the web server is able to communicate with PHP-FPM service, we will create a PHP script that will output some content in the web browser. In this example, we will call the phpinfo() function to output information about the PHP instance. You should remember to delete this file when done.
Rather than create virtual host configuration files, we will rely on the web server’s default website configuration. With this, we will create and save the PHP script in /var/www/html/ directory. To learn more about creating virtual hosts, read in the discussion on setting up Apache virtual hosts.
From the command interface, type and execute the following command:
sudo nano /var/www/html/info.phpType or paste the following code in the text editor:
<?php
    phpinfo();
Save and exit the editor.
If you have an IP address assigned to your Ubuntu system, then type the following in your browser’s address bar, replacing YOUR_IP_ADDRESS with your assigned IP address.
http://YOUR_IP_ADDRESS/info.php
If you do not have an IP address assigned to your Ubuntu system, you can replace IP_ADDRESS with localhost:
http://localhost/info.php
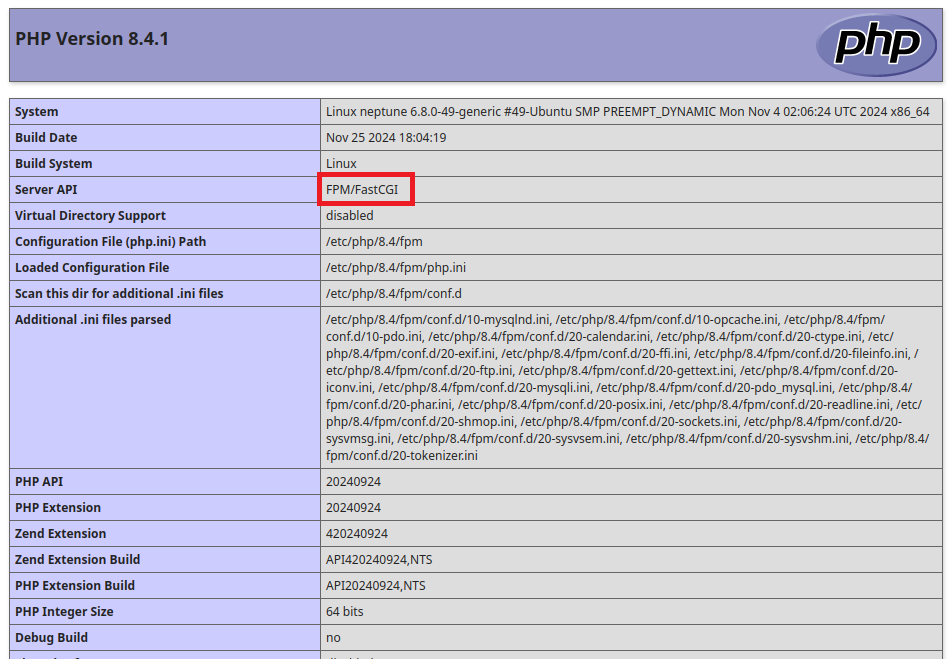
You should see some information about the version of PHP that has been configured to process PHP scripts on your Ubuntu system. A sample view is shown below:

As can be seen, the web server is able to communicate with PHP-FPM. The content displayed in the browser window is the result that the web server received from PHP-FPM.
We can also identify that PHP is running as FastCGI process, indicated as FPM/FastCGI in the marked region for Server API.
Wrapping Up
In this guide, we have looked at how to configure the Apache web server to communicate with PHP-FPM through the FastCGI protocol. This makes it possible for the web server to pass PHP scripts to PHP for processing.
In completing the configuration, we installed the FastCGI module for the Apache web server and enabled its proxy modules.