PHP is a very popular server side programming language that is used to develop dynamic web applications.
In this guide, we will install PHP 8.4 on a Ubuntu Linux system. We will understand how to install PHP 8.4 extensions to extend its functionality in PHP applications. Additionally, we will understand how we can configure Nginx web server to interact with PHP 8.4 for web requests.
Prerequisites
To follow along with this guide, it is assumed that you are running a Ubuntu Linux system and have root or non-root privileges to install packages. It is also assumed that you have basic knowledge of PHP, and should be conversant with the command-line interface.
Step 1: Update the System
Before we install PHP, it is important that we update the software package index on the Ubuntu Linux system so that we will have up-to-date list of available packages.
To update the system packages index, we will type and execute the following command:
sudo apt updateStep 2: Add PHP Repository
By default, Ubuntu 24.04 ships with PHP 8.3. Since we intend to install PHP 8.4 instead, we will need to add a PHP repository that provides pre-built package for PHP 8.4. A very popular provider of pre-built PHP versions is Ondrej Sury’s repository which we will use to install PHP 8.4 on Ubuntu 24.04 Linux system.
To add the repository, type and execute the following command:
sudo add-apt-repository ppa:ondrej/phpIf you are using an earlier version of Ubuntu, such as Ubuntu 22.04 or Ubuntu 20.04, and you get an error message informing you of add-apt-repository command not found, then you will need to type and execute the following command:
sudo apt install software-properties-commonThen execute the command again to add the repository:
sudo add-apt-repository ppa:ondrej/phpWith the repository added, we need to update our system to have the latest list of available packages:
sudo apt updateWe can now proceed to install PHP 8.4.
Step 3: Install PHP 8.4
To install PHP 8.4 on our Ubuntu system, we will type and execute the following command:
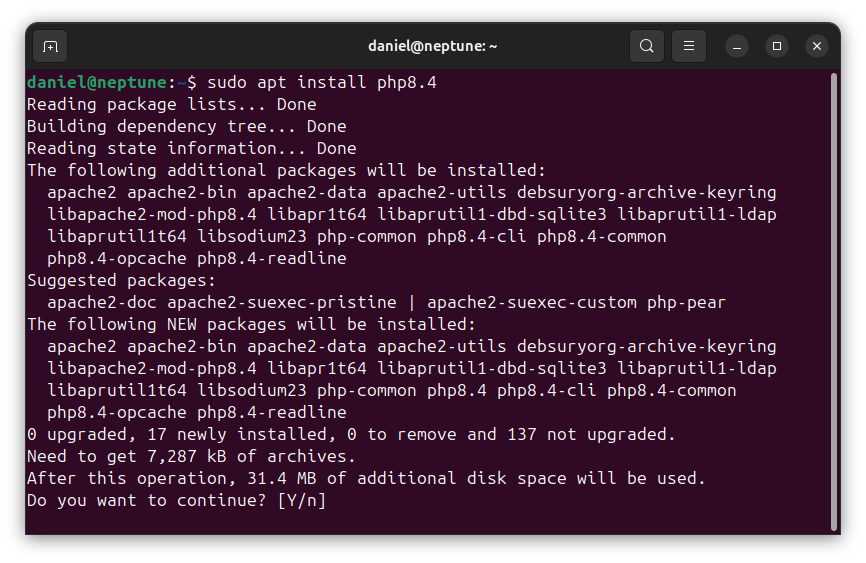
sudo apt install php8.4After executing the above command, we will wait for the packages to be downloaded for installation. When asked to confirm, type Y and press the [Enter] key to continue:

Step 4: Verify PHP Installation
We can verify that PHP 8.4 is installed on the Ubuntu system by issuing the command to check its version:
php -vThis should display the version of PHP installed on the system. A sample output is shown in the following image:

Step 5: Install PHP Extensions
PHP extensions are libraries that provide additional functionality to PHP applications. There are several PHP extensions that we may need to install after installing PHP.
Common PHP extensions that may need to be installed include php-fpm, php-cli, php-mbstring, php-xml, etc.
When installing PHP extensions which aren’t default in the Ubuntu repository, we will need to specify the version of PHP for which we want to install the extensions. We specify the version number immediately after php, followed by a separator, then the extension name. The general format to specify a PHP extension for installation is given as follows:
php<version-number>-<extension-name>.
For example, we can specify to install php-fpm for PHP 8.4 as php8.4-fpm. We can similarly install extensions such as php8.4-cli, php8.4-mbstring, php8.4-xml, etc.
Installing PHP-FPM on Ubuntu
PHP-FPM is a FastCGI Process Manager for PHP that can handle multiple requests simulatenously. These days, it is very common to use PHP-FPM It is available in the default repository for Ubuntu.
To install PHP-FPM on Ubuntu system, we will need to execute the following command:
sudo apt install php8.4-fpmRemember that we installed PHP 8.4. Since this is not the default PHP in Ubuntu 24.04 repository, we had to specify the version number of PHP for which we intend to install PHP-FPM, in this case php8.4-fpm.
Installing Other PHP Extensions
There are several other PHP extensions that can be installed to extend the functionality of PHP in applications. The following command shows how to install additional PHP extensions that may be needed:
sudo apt install php8.4-{cli,mbstring,xml,mysql,mysqlnd,gd}Observe the argument to the install command very well. Rather than precede individual extension names with php8.4-, we type php8.4- separately and enclose the individual extension names that we want to install, separated by commas, in braces, {}. It is a shorthand to specifying the full version numbered name of each extension for installation, and expands to a similar installation command given below:
sudo apt install php8.4-cli php8.4-mbstring php8.4-xml php8.4-mysql php8.4-mysqlnd php8.4-gdStep 6: Testing PHP Installation
With PHP 8.4 installed on Ubuntu server, we will need to make a test to be sure that everything went well. We will make two tests: one with PHP CLI, and the other through a web request.
To begin, let’s create a PHP file that we can use for testing. We will use nano text editor to write the PHP code.
Type and execute the following command to start nano text editor:
sudo nano /var/www/html/test.phpAfter executing the command, nano text editor will open. Type the following PHP code into the editor.
<?php
    echo "Hello, PHP is working!\n";
To save the file, press Ctrl+O, then on [Enter] key on your keyboard to save the file. To exit the editor, press Ctrl+X on your keyboard.
We now have simple PHP file that we can use to test and confirm that PHP is working.
As said earlier, we will perform two tests. We will perform one test through the command-line interface (CLI), which is the simplest and fastest. The second test will be through a browser, which will require further configuration with a web server such as Nginx or Apache.
Testing PHP in CLI
The simplest and fastest way to test our PHP installation is through the command-line interface (CLI). Running PHP using the CLI requires that the PHP CLI extension, php8.4-cli, is installed. If you have not installed this PHP extension, then run and execute the following command:
sudo apt install php8.4-cliRemember the test file that we created:
/var/www/html/test.php
We will run this PHP file and check the output. From the command-line, type and execute the following command:
php /var/www/html/test.phpFrom the command, we pass the file test.php that we created to the php command. If PHP is working correctly, you should see the following output:

Notice that the output above shows the text from the echo statement in the test.php file.
Testing PHP On The Web
Nearly all cases, PHP applications are developed as web applications that can be served through a web browser. To make PHP applications interact with the web, we will need to link a web server, such as Nginx or Apache, with PHP. To do this, we will need to configure the web server so that it will be able to communicate with PHP.
In the following section, we will look at how to configure Nginx web server to interact with PHP.
Configure Nginx for PHP
To configure Nginx web server for PHP, we will need to instruct the web server to run PHP when it encounters files that have .php file extension. A very convenient approach is to write the directives in a separate file so that we can reuse it in other server blocks.
As discussed in installing and configuring Nginx on ubuntu 24.04, Nginx web server supports the hosting of multiple websites through the setting up of server blocks (virtual hosts). By writing the directives to run PHP files in a separate file, we can reuse the directives in other server blocks for multiple website hosting.
Let’s use nano text editor to create the file and write the directives for Nginx web server to interact with PHP. We will save the file in Nginx root directory, /etc/nginx:
sudo nano /etc/nginx/php84.handlerThe .handler extension is our own making. It is not required by Nginx. You can choose to give the file any extension or omit the extension.
In nano text editor, type the following Nginx directives. You can ignore the comments, as they are not mandatory.
location ~ \.php$ {
    # run with php8.4-fpm socket
    fastcgi_pass unix:/run/php/php8.4-fpm.sock;

    # include fastcgi configuration
    include fastcgi.conf;
}
Line 1 tests for files with .php extension. If matched, the lines enclosed in the braces, {}, are executed. There are additional directives that can be used within the braces but the two directives used here are enough to link Nginx and PHP.
Line 3 informs the web server to run php8.4-fpm socket. Take notice of the PHP version number, 8.4. This is the PHP version we installed. If we install a different version of PHP, such as a future update like PHP 8.5, then we will need to update the PHP version number on line 3 to php8.5-fpm, or the version number of PHP that is installed.
The directive on line 6 includes Nginx configuration for FastCGI.
Save the file in the text editor by pressing Ctrl+O, then on [Enter] key to save. Press Ctrl+X to exit the editor.
We are now ready to test PHP in a web request. As discussed in installing and configuring Nginx on Ubuntu, it is always a good idea to test for errors in the web server configurations, especially after we perform updates in the configuration files.
sudo nginx -tIf the test is successful, we will need to reload the Nginx configuration:
sudo systemctl reload nginxWe will test PHP in a web request, specifically from a web browser. If you have the IP address to your Ubuntu system or server, then you can type the IP address, forward slash, then test.php:
http://IP_ADDRESS/test.php
If IP address isn’t available, we can test with localhost, such as in the following:
http://localhost/test.php
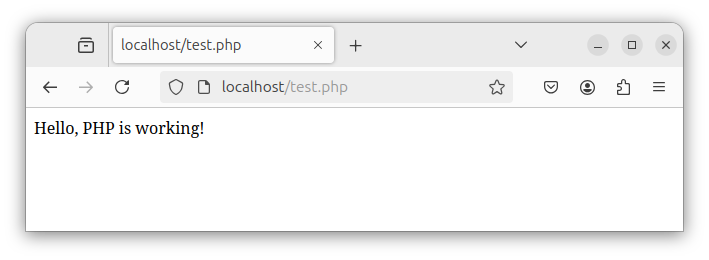
Go ahead and type the URL in the browser’s address bar. This should display the output of the echo statement in the test.php file in the browser window. The following image is a sample view:

If you see the output of the echo statement in the browser window, then you’ve done it. You have been able to install PHP 8.4 and set it up to be used in a web request as well as from the command-line interface. Congratulations!
Conclusion
In this guide, we installed PHP 8.4 on a Ubuntu Linux system. To be able to extend the functionality of PHP, we looked at how to install PHP 8.4 extensions.
For PHP applications to interact with to be able to use PHP in web requests, we configured Nginx web server to be able to interact with PHP-FPM.o be able to use PHP in web requests, we configured Nginx web server to be able to interact with PHP-FPM.he web, we configured Nginx web server to execute PHP files using PHP-FPM extension.