OpenVPN is a free and open-source Virtual Private Network (VPN) software that is widely used to create VPN tunnels to secure network communications. It can be used to shield client identities, as VPN clients are able to browse the internet using the network identify of the VPN server.
In this guide, we will look at how to set up OpenVPN server, and also set up the necessary security protocols to ensure that data exchanges through the network are secure.
The approach used in this guide involves much practical work, but however not intimidating. This is because separate tools are needed to set up and enhance the security of the VPN server.
I will discuss how to create your own Certificate Authority (CA), generate digital certificates for the CA, VPN server, and clients, as well as how to generate static SSL/TLS authentication key for secure connection.
In addition, this guide will demonstrate how to distribute OpenVPN client configuration files for connection with the VPN server.
If you need a very simplified approach to installing and using OpenVPN server, I will recommend the simplified guide to install and use OpenVPN server which can be completed within 5 minutes using an install script. However, the simplified approach hides many things from you, and you may use the approach if you are not interested in the very basics of setting up a VPN server from scratch.
If you need a comprehensive understanding of how to set up an OpenVPN server from scratch, tweaking configurations to suit your needs, then this guide is for you. Welcome!.
Table of Contents
- Prerequisites
- Step 1: Update Packages Index
- Step 2: Install OpenVPN and Easy-RSA
- Step 3: Set Up Certificate Authority (CA)
- Step 4: Server Certificate
- Step 5: Client Certificate
- Step 6: Generate Diffie Hellman (DH) Parameters
- Step 7: Generate TLS Authentication Key
- Step 8: Configure OpenVPN Server
- Step 9: Adjust Firewall
- Step 10: OpenVPN Client Configuration
- Wrapping Up
Prerequisites
To get along with this guide, it is expected that you have Ubuntu system and a user account with administrative privileges to install packages.
Additionally, you should have access to the root account in order to run commands to generate certificate requests and digitally sign them. Basic knowledge of linux commands is essential to complete the tasks ahead.
The instructions in this guide have been tested on Ubuntu 24.04 and Ubuntu 22.04. If you are using an earlier version of Ubuntu, it is most likely this guide will work for you.
Step 1: Update Packages Index
Before installing OpenVPN, it will be ideal to update the software packages index. This ensures that you have latest list of available packages from the Ubuntu repository.
Type and execute the following command to update the software packages index:
sudo apt updateOptionally, you can upgrade installed software packages by running the following command:
sudo apt upgradeStep 2: Install OpenVPN and Easy-RSA
To set up a very secure OpenVPN server on a Ubuntu system, we will use the Easy-RSA package to create authentication key as well as server and client certificates that will be used in authentication. Thus, we will install OpenVPN with the Easy-RSA package.
Type and execute the following command to install OpenVPN and Easy-RSA packages:
sudo apt install openvpn easy-rsaStep 3: Set Up Certificate Authority (CA)
In setting up your website for access through HTTPS, you usually create SSL/TLS certificate for client and server (website) communications. This SSL/TLS certificate is issued by a Certificate Authority (CA) that validates the identity of your website, instilling much trust in clients for data exchanges with your website through a secure connection.
A very popular Certificate Authority (CA) is LetsEncrypt, which provides free SSL/TLS certificates to millions of websites. However, LetsEncrypt usually issues SSL/TLS certificates to websites, or servers, but not to the clients using your websites.
Since clients will be connecting to your VPN server, it will be helpful if you can validate their identity using SSL/TLS certificates. Conversely, clients will also be interested to validate the identity of the VPN server they are connecting to. Thus, there is the need to issue SSL/TLS certificates to both clients and the VPN server to enhance mutual trust.
To do this, you can create your own Certificate Authority (CA) that will be used to digitally sign and issue SSL/TLS certificates to the VPN server as well as clients. The Easy-RSA package can be used to perform this task.
First type and execute the following command to create a directory for the Certificate Authority (CA):
sudo make-cadir /etc/openvpn/easy-rsaThe above command creates a directory, /etc/openvpn/easy-rsa/, as the Certificate Authority (CA) directory from which you can run commands to issue SSL/TLS certificates.
The CA directory that has been created is very restrictive, and you will need root permissions to run commands from this directory. To achieve this, you will switch to the root user account.
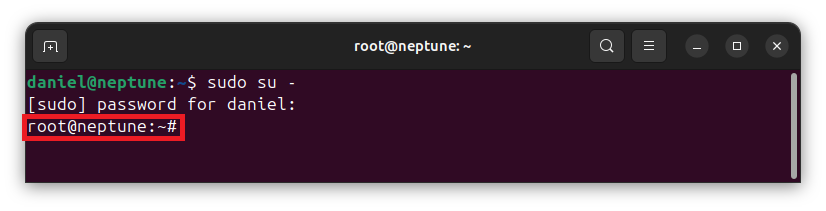
Type and execute the following command to switch from your own account to the root user account:
sudo su -Observe from the command prompt that you will now be running commands as the root user:
When we are done, you can switch back to your own account by repeating the previous command, whiles replacing the dash character (-) with your account name. For example:
sudo su YOUR_ACCOUNT_NAMEYou will be running almost all commands from the CA directory, /etc/openvpn/easy-rsa. Hence, it will be ideal to execute the following command to change from the current directory to the CA directory:
cd /etc/openvpn/easy-rsaThere is a package utility in this directory named easyrsa. You will be running this package utility to perform several of the tasks ahead. The subsequent sections therefore assume that you run the commands from the CA directory, /etc/openvpn/easy-rsa.
Initialize Public Key Infrastrucutre (PKI)
To create a very secured VPN server, you will create several related files which includes CA certificates, OpenVPN server certificates, client certificates, as well as TLS authentication keys. It will be helpful to organize these file associations into a defined directory.
The collection of the files and the associations of the CA, keypairs, certificate requests, and issued certificates is referred to as Public Key Infrastructure (PKI). We can initialize a PKI so that we will have the security related files in an organized directory structure.
Type and execute the following command to initialize the Public Key Infrastructure (PKI):
./easyrsa init-pkiThe above command will create a directory with name pki under the current directory. That is, /etc/openvpn/easy-rsa/pki/. As indicated earlier, this directory will contain the CA related files, comprising of the CA certificate, VPN server and clients certificates, SSL/TLS static authentication key, etc.
If you list the contents of /etc/openvpn/easy-rsa directory, you can confirm that the pki directory has been created:
/etc/openvpn/easy-rsa# ls -lYou can see the pki directory from the following image:

The /etc/openvpn/easy-rsa/pki/ directory will house the CA related files that will be generated.
Create Certificate Authority (CA)
To create the Certificate Authority (CA) that will be used to issue signed TLS/SSL certificates to the OpenVPN server and clients, type and execute the following command:
./easyrsa build-caYou will be asked to enter a paraphrase for the CA. This paraphrase is a password which will be required when you need to sign SSL/TLS certificates to be issued to the VPN server and clients. It is therefore important to keep it safe, without letting it slip to the hands of untrusted third parties.
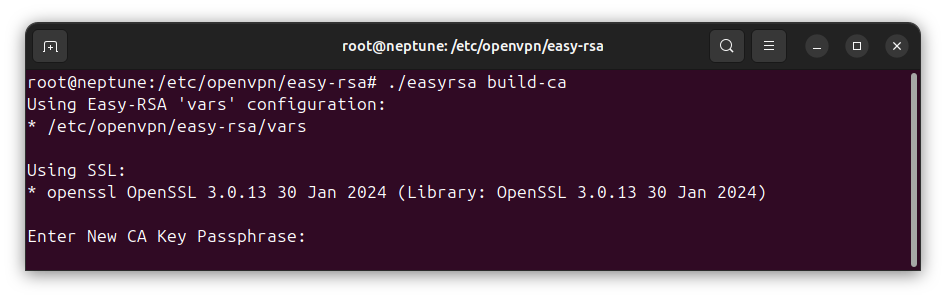
Enter the paraphrase, then press the [Enter] key on your keyboard. You will be asked to re-enter the paraphrase for confirmation.
Next, you will be asked to enter a Distinguished Name (DN) for the CA. A default name will be suggested for you, and you can accept this name by pressing the [Enter] key on your keyboard.
You will be given a notice that the CA creation is completed. You will also be given the name of the CA certificate in the PKI.
You can identify from the image below that CA certificate has been created with the name ca.crt, and with the absolute file name /etc/openvpn/easy-rsa/pki/ca.crt.

With your own Certificate Authority (CA) setup completed, you are now ready to generate SSL/TLS certificates to the VPN server as well as clients that will connect to the VPN server.
Step 4: Server Certificate
Generating SSL/TLS certificate requires that you first generate a request for a certificate, usually referred to as certificate request. The certificate request will then be sent to the Certificate Authority (CA) to be digitally signed before it will be issued to the client or the VPN server.
Request for Server Certificate
When generating a certificate request, you will be asked to enter a Common Name for the keypair (private and public keys). This is simply a name that will identify the peer. You can provide a name that identifies the server, such as a host name, a server name, or a user account name: You can even use a sub-domain as the Common Name.
In the following command, you should replace YOUR_VN with your preferred name that will be used to identify the certificate keypair.
Type and execute the following command to generate a request for the VPN server keypair:
./easyrsa gen-req YOUR_VPN_SERVER_NAME nopassAs indicated earlier, easyrsa is a package utility in the CA directory, and you will be running most commands with this utility. The preceding characters, ./, are important to run the easyrsa package utility.
The use of nopass in the command indicates that you do not need a password for the certificate. If you want to password protect the certificate, then ignore nopass in the command.
After executing the command, you will be presented with a suggested Common Name for the keypair (private and public keys) based on the name you entered for the certificate request. If you agree with the suggested name, then press the [Enter] key on your keyboard to continue. If you want to use a different name, then type your preferred name and press the [Enter] key on your keyboard to continue.
After pressing the [Enter] key, the private key and certificate request will be created for you:
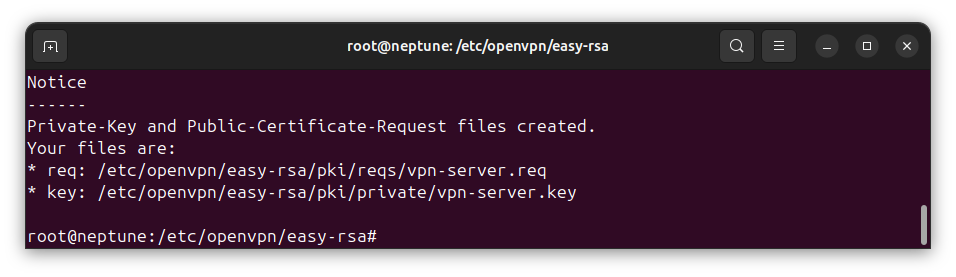
The private key and certificate request for the VPN server have been created. However, the certificate request has not been signed yet. Since it is not signed by a Certificate Authority (CA), VPN clients will not have trust in their connections and data exchanges with the server.
The next step is to sign the certificate request with the CA.
Sign Server Certificate
To sign the VPN server certificate, type and execute the following command:
./easyrsa sign-req server YOUR_VPN_SERVER_NAMEYou should replace YOUR_VPN_SERVER_NAME with the name you provided in the earlier command you used to create the certificate request.
From the command, you can notice that there is the word server before YOUR_VPN_SERVER_NAME. This is an indication that we want to sign a certificate for a server, not client. Let’s understand why this is important.
A certificate can be signed for a VPN server or client. The signing request command needs to know whether it is signing for a client or the VPN server. This is the reason why server was specified in the command, followed by the certificate request name. Later, in the next section, you will specify client in the command when signing a certificate request for a VPN client.
After executing the certificate signing request command above, you will be asked to confirm the request:
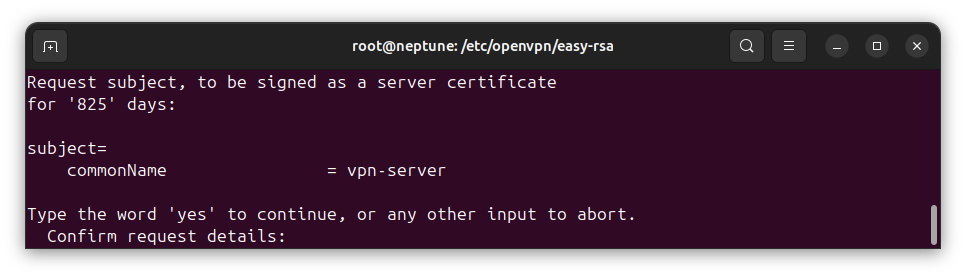
Type yes to confirm and continue.
Next, you will be asked to enter the password for signing with the CA key. I earlier informed you that the password will be required when signing certificates.

Type the CA paraphrase, then press [Enter] on your keyboard to complete the signing of the VPN server certificate.
Observe that the signed certificate is saved in the issued/ directory, also under the Public Key Infrastructure (PKI) directory.
Step 5: Client Certificate
Like the VPN server, we can create SSL/TLS certificate for VPN clients that will be connecting the server. As you will see, the commands to generate a client certificate are similar to that of the server. You will generate a certificate request, and then make a signing request with the CA to append its signature to the certificate.
Request for Client Certificate
To generate a request for client certificate, type and execute the following command:
./easyrsa gen-req VPN_CLIENT_NAME nopassYou will be asked to enter a Common Name for the VPN client. The name that you specified as the client name in the command will be suggested for you, enclosed in brackets:
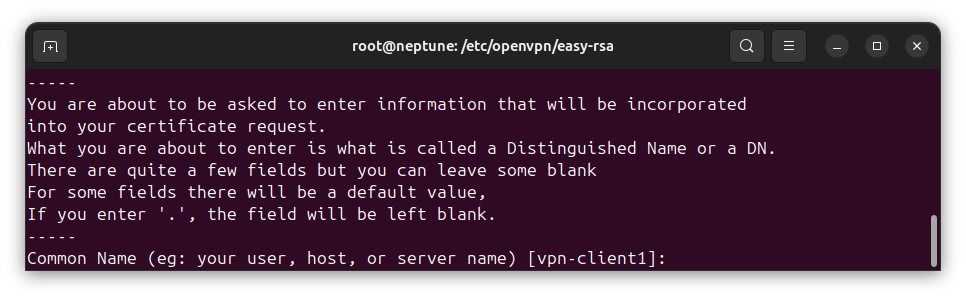
If you prefer to use the suggested name, press [Enter] key on your keyboard, otherwise, type your preferred name and press the [Enter] key to continue.
The client’s private key and certificate request will be generated. The private key will be saved in /etc/openvpn/easy-rsa/pki/private/ directory. If you list the contents of this directory, you will see the client’s private key there:
ls -l pki/private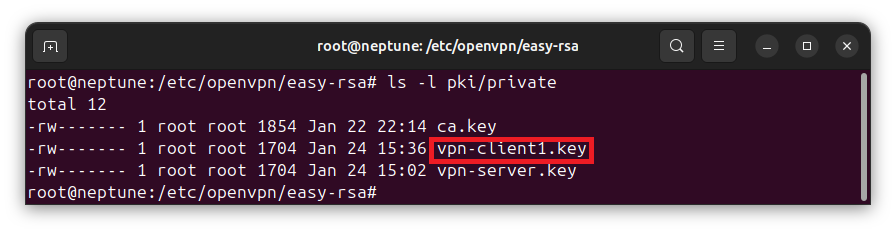
The client certificate request will also be generated and saved in /etc/openvpn/easy-rsa/pki/reqs/ directory, waiting to be signed by the Certificate Authority (CA).
Sign Client Certificate
With the client certificate request generated, you can now sign it with the Certificate Authority. Again, think of this as the CA appending its signature on the certificate so that it will be trusted by the other party, in this case, the VPN server.
Type and execute the following command to begin the certificate signing request:
./easyrsa sign-req client VPN_CLIENT_NAMEReplace VPN_CLIENT_NAME with the name you used for the client when you generated the certificate request.
After executing the command, you will be asked to confirm the signing request:
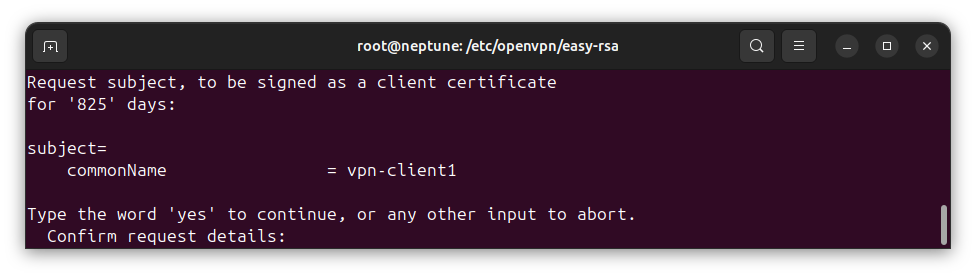
Check the commonName to be sure of the client certificate request for which you are making a signing request. To confirm, type yes, then press [Enter] on your keyboard to continue.
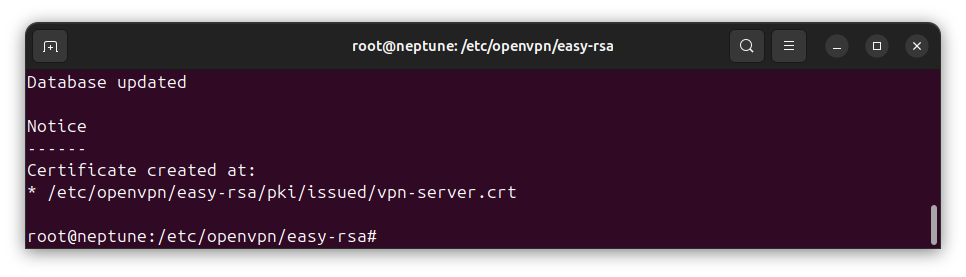
You will be required to enter the certificate signing password for the CA. Enter the paraphrase, then press [Enter] to continue. The signed certificate for the client will be generated and saved in the issued certificates directory, /etc/openvpn/easy-rsa/pki/issued/.
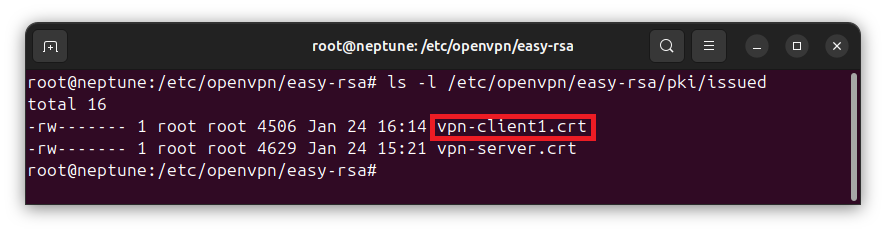
If you list the contents of /etc/openvpn/easy-rsa/pki/issued/ directory, you will see that the signed certificate for the client has been generated:
ls -l /etc/openvpn/easy-rsa/pki/issued/The following shows that the signed certificate issued to the VPN client is saved in the /etc/openvpn/easy-rsa/pki/issued/ directory.
Step 6: Generate DH Parameters
Next, you need to generate Diffie-Hellman (DH) parameters file which you will include in the server configuration.
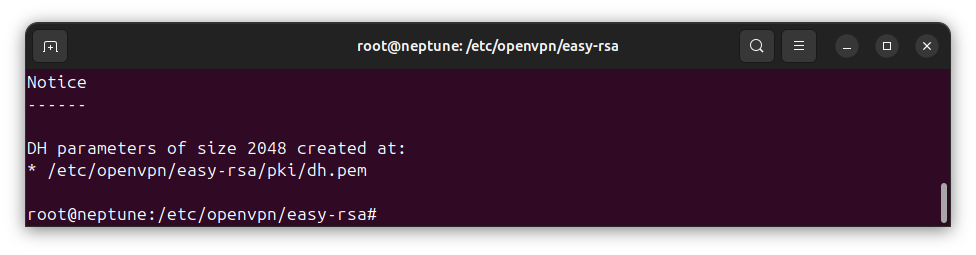
Type and execute the following command to generate the DH parameters file:
./easyrsa gen-dhThe above command will generate DH parameters file, dh.pem. This will will be saved in the PKI directory, with the absolute file name /etc/openvpn/easy-rsa/pki/dh.pem, as seen below:
Step 7: Generate TLS Authentication Key
For added security, it will be ideal to generate HMAC key for SSL/TLS authentication with the OpenVPN server. This can protect against port scanning, DoS (Denial of Service) attacks, and unauthorized SSL/TLS handshake initiations.
The SSL/TLS authentication key can be generated with tls-auth, tls-crypt, or tls-crypt-v2. The tls-crypt option is an improvement over tls-auth, and tls-crypt-v2 is an improvement over tls-crypt.
From other resources, you will mostly find tls-auth being used to generate the static key. However, in this guide, we will use tls-crypt option to generate the static key since it is an improvement over tls-auth. You can generate the static key with any of the other options, such as tls-auth, if you like.
To generate the static key for SSL/TSL authentication, type and execute the following command:
openvpn --genkey tls-crypt /etc/openvpn/easy-rsa/pki/tc.keyThis will generate the static authentication key with the name tc.key, and will be saved in /etc/openvpn/easy-rsa/pki/ directory. You can choose to give it a name you like.
If you prefer to generate the key with tls-auth option instead, as is commonly used, then replace tls-crypt with tls-auth in the previous command. An example command with tls-auth option is shown below:
openvpn --genkey tls-auth /etc/openvpn/easy-rsa/pki/ta.keyHowever, tls-crypt improves on tls-auth by adding symmetric encryption to the control channel, and is therefore preferred to tls-auth in this guide.
Step 8: Configure OpenVPN Server
OpenVPN installation ships with sample configurations for both the VPN server and clients. The preferred method to set server configuration parameters and values is to make a copy of the sample server configuration and then set configuration values in the copy.
To make a copy of the sample server configuration file, type and execute the following command:
cp /usr/share/doc/openvpn/examples/sample-config-files/server.conf /etc/openvpn/server.confAs can be seen, we copy the sample server configuration file, and name our copy server.conf, saved in /etc/openvpn/ directory.
Type and execute the following command to open your copy of the server configuration file. You will provide your own configuration values for the configuration parameters:
nano /etc/openvpn/server.confThe above command will open the file in nano text editor. Scroll through the file until you find the following line:
port 1194
This is the port on which the VPN server will listen. It is the default OpenVPN server port. If you need to use a different port, then change it to your preferred port number. Later, you will adjust the firewall to allow connections through this port. Therefore, you should take note of the port that you specify.
Scroll down again until you see the following lines:
;proto tcp
proto udp
This defines the protocol to be used for the VPN connection. UDP is the widely used protocol for OpenVPN server, and it is also the default. If you need to use TCP protocol, uncomment proto tcp by clearing the preceding semicolon, then comment out proto udp by placing a semicolon before it. UDP is, however, the preferred protocol for OpenVPN connections.
Again, scroll through the file until you see the following lines:
ca ca.crt
cert server.crt
key server.key # This file should be kept secret
The configuration parameter ca, refers to the certificate for the CA, cert refers to the signed certificate for the VPN server, and key refers to the private key for the VPN server. If you recall, these files exist with the following absolute names:
- ca:
/etc/openvpn/easy-rsa/pki/ca.crt - cert:
/etc/openvpn/easy-rsa/pki/issued/YOUR_VPN_SERVER_NAME, whereYOUR_VPN_SERVER_NAMEis the name you used to generate the certificate request for the VPN server - key:
/etc/openvpn/easy-rsa/pki/private/YOUR_VPN_SERVER_NAME, whereYOUR_VPN_SERVER_NAMEis the name you used to generate the certificate request for the VPN server
You need to set the values of these parameters to their respective absolute file names, such as the following:
ca /etc/openvpn/easy-rsa/pki/ca.crt
cert /etc/openvpn/easy-rsa/pki/issued/YOUR_VPN_SERVER_NAME.crt
key /etc/openvpn/easy-rsa/pki/private/YOUR_VPN_SERVER_NAME.key
Next, find the DH configuration parameter in the file.
dh dh2048.pem
Set its value to the absolute file name of the Diffie Hellman file that was created earlier. The file was named dh.pem in this guide. If you used a different name, replace dh.pem with the name you used.
dh /etc/openvpn/easy-rsa/pki/dh.pem
Scroll further until you see the topology property. You will notice that its value is set to subnet. If the line is commented out with a preceding semicolon, uncomment it by clearing the semicolon:
topology subnet
If you are using OpenVPN version 2.6, see if you have cipher or data-ciphers property. If you need to know the version of your OpenVPN installation, use the following command:
openvpn --versionThe cipher property is deprecated in OpenVPN 2.6. If you have it, and you are using OpenVPN version 2.6, replace it with data-ciphers and set its value as shown below:
data-ciphers AES-256-GCM:AES-128-GCM:?CHACHA20-POLY1305:AES-256-CBC
If you are using OpenVPN version prior to version 2.6, you may have cipher set to AES-256-CBC. If so, set its value to AES-256-GCM instead.
cipher AES-256-GCM
Scroll through the file and look for the following line:
;push "redirect-gateway def1 bypass-dhcp"
Clear the preceding semicolon to configure clients to redirect their default network gateway through the OpenVPN server.
push "redirect-gateway def1 bypass-dhcp"
Then find the following lines, which are also commented out:
;push "dhcp-option DNS 208.67.222.222"
;push "dhcp-option DNS 208.67.220.220"
Uncomment the lines and replace the IP addresses with your DNS IP addresses. You can replace the IP addresses with Google’s public DNS IP addresses, as shown below:
push "dhcp-option DNS 8.8.8.8"
push "dhcp-option DNS 8.8.4.4"
Continue scrolling until you find the tls-auth property, which is commented out:
;tls-auth ta.key 0 # This file is secret
This guide generated a tls-crypt static key rather than tls-auth static key. This is because tls-crypt is an improvement over tls-auth. If you generated a tls-crypt static file, as was done in this guide, ensure that it is commented out, with a semicolon preceding tls-auth. Then, just below the tls-auth line, add the following line:
tls-crypt /etc/openvpn/easy-rsa/pki/tc.key
If you generated the SSL/TLS static authentication key with tls-auth instead, then uncomment the tls-auth line and set its value to the tls-auth file that you generated, commonly named ta.key. For example:
tls-auth /etc/openvpn/easy-rsa/pki/ta.key 0 # This file is secret
By default, OpenVPN sends its logs to system log file, syslog. It will be ideal for the OpenVPN server to have its own log file. Search for the following lines in the file. They are all commented out:
;log         /var/log/openvpn/openvpn.log
;log-append  /var/log/openvpn/openvpn.log
Only one of the two must be enabled. The log-append property will append to the existing log whiles the log property will reset the log data. You can enable the log-append if you prefer that:
log-append /var/log/openvpn/openvpn.log
If you are using nano text editor, save the file by pressing Ctrl+O, then press the [Enter] key to save the file. Press Ctrl+X to exit the editor.
You should start the OpenVPN server for the configuration values to take effect. Type and execute the following command:
systemctl start openvpn@serverTake note of @server after openvpn in the command. The @server part tells OpenVPN which server configuration file to use.
Recall that we created the server configuration file with the name server.conf. If you have a different name for the VPN server configuration file, then you should replace server with the name of your VPN server configuration file. For example:
systemctl start openvpn@my-server-config-fileYou can check to see the status of the OpenVPN server with the following command:
systemctl status openvpn@server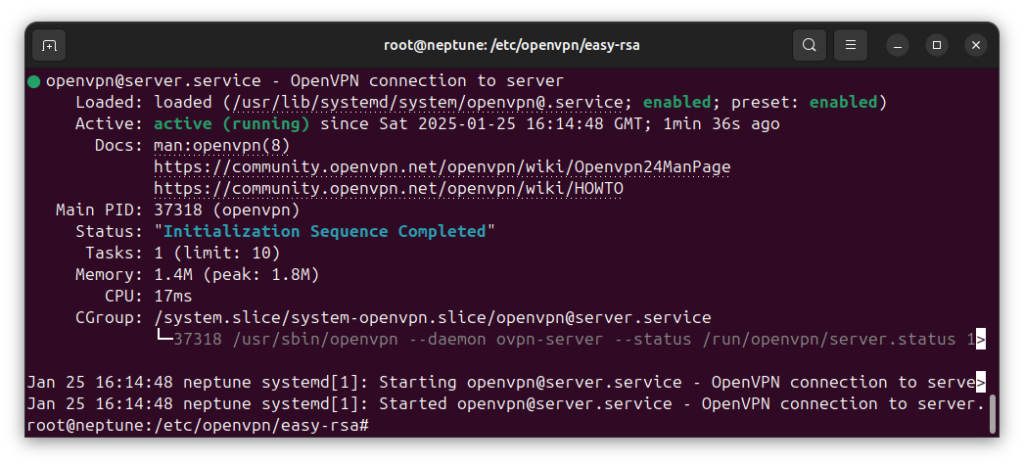
If you want the OpenVPN server to be started automatically on system boot, type and execute the following command:
systemctl enable openvpn@serverIf you need to restart the OpenVPN server, use the following command:
systemctl restart openvpn@serverTo know the version of your OpenVPN installation, use the following command:
openvpn --versionStep 9: Adjust Firewall
To be able to connect to the VPN server when the firewall has been enabled, you will need to adjust the firewall to allow connections through the port on which the OpenVPN server listens.
By default, OpenVPN uses port 1194 through UDP protocol. If you specified a different port in the port specification, you will need to replace the port used in this guide with your port number.
I assume that you are using ufw firewall. However, we will run iptables command at some point.
Allow VPN Port
First, type and execute the following command to allow connections through the port. Remember to replace 1194 with the port that you specified, if yours is different.
ufw allow 1194/udpClient Internet Access
For VPN clients to be able to access the internet, data packets from the VPN tunnel network interface will have to be forwarded through your internet accessing network interface, and vice versa.
The network interfaces have specific identifiers assigned to them, and there is the need to know these identifiers in order to use them in the iptables rules. Type the following to see the network interfaces:
ip addrYou should see the list of network interfaces on your system, such as shown below:
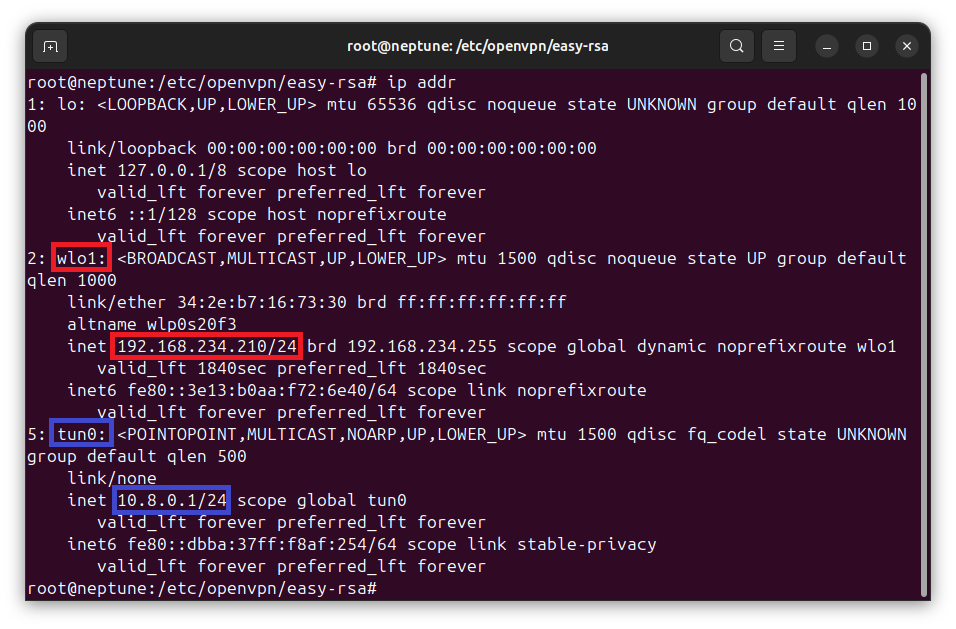
First, identify the public IP address of your system and note down the network interface identifier. From the above example, the system’s network interface identifier is wlo1, marked in red.
Next identify the VPN server IP address. For the OpenVPN setup, this is 10.8.01. It can be identified that the tunnel network interface identifier is tun0, marked in blue.
In most cases, the VPN tunnel interface identifier will be tun0. However, your system’s network interface identifier may be different, and you will need to replace wlo1 with yours. For example, if your system’s network interface identifier is eth0, then replace wlo1 with eth0 in the commands that follow.
The firewall can be adjusted so that VPN clients connections can be routed with the public IP address of the device on which the VPN server is running. This is done by using the MASQUERADE target of iptables. Type and execute the following command, replacing wlo1 with your system’s network interface identifier.
iptables -t nat -A POSTROUTING -s 10.8.0.0/24 -o wlo1 -j MASQUERADE10.8.0.0/24 is the VPN network subnet. The VPN server will use the private address 10.8.0.1 when started.
To forward packets from the VPN tunnel network interface (tun0) to the system’s network interface (wlo1), type and execute the following command:
iptables -A FORWARD -i tun0 -o wlo1 -j ACCEPTAgain, you should remember to replace occurrences of wlo1 with your system’s network interface identifier.
You will also want to allow packets that are destined for your VPN clients to be forwarded from the system’s internet accessing network interface (wlo1) to the VPN tunnel network interface (tun0). Type and execute the following command:
iptables -A FORWARD -i wlo1 -o tun0 -j ACCEPTIf you observe the previous two commands carefully, you will notice some similarity. For brevity, I show them together, below:
iptables -A FORWARD -i tun0 -o wlo1 -j ACCEPT
iptables -A FORWARD -i wlo1 -o tun0 -j ACCEPT
The first line allows the forwarding of packets from the tunnel network interface (tun0), to the system’s internet accessing network interface (wlo1). The second is just the opposite. Packets from the internet accessing network interface (wlo1) will be forwarded to the VPN tunnel network interface (tun0).
The iptables rules that have been added will take effect immediately. However, the rules will be lost when the system is rebooted. It will be ideal to persist the iptables rules that have been added so that they will still work when the system is rebooted.
Type and execute the following command to permanently save the iptables rules you just added:
iptables-saveStep 10: OpenVPN Client Configuration
Each VPN client that has to connect to the VPN server needs a configuration. The client configuration is a normal text file that contains several information which identify both the VPN server and client. They include the public IP address of the device on which VPN server is running, the protocol and port on which the VPN server listens, etc.
Other vital security information that are needed include the following:
- The Certificate Authority (CA) certificate, which was generated as
/etc/openvpn/easy-rsa/pki/ca.crt. The VPN server has a copy of this CA certificate. - The SSL/TLS static authentication key, which was generated as
/etc/openvpn/easy-rsa/pki/tc.key. The VPN server has a copy of this key. - The client certificate, signed and issued by the CA, which was generated as
/etc/openvpn/easy-rsa/pki/issued/VPN_CLIENT_NAME.crt, where VPN_CLIENT_NAME is the name you used when you generated the client certificate request. - The client private key, which was generated as
/etc/openvpn/easy-rsa/private/VPN_CLIENT_NAME.key, where VPN_CLIENT_NAME is the name you used when you generated the client certificate request.
You will need to copy these files to the client machine or device and use them in configuring the client for connection.
But let’s face it. Not all VPN users have the technical knowledge to import the above mentioned security files in their client configurations. If you distribute these individual files to them, they may not be able to import and use them.
It will be helpful to create a single file that contains all the configuration parameters and their values needed to connect to the VPN server, including the contents of the certificates. You will then send this single configuration file to your client to import the values using OpenVPN client application.
For VPN users who have technical knowledge in configuring the client, you can distribute the four certificate related files mentioned earlier to them to set up their VPN client for connection.
In the following section, we will look at how to create a single configuration file, usually with .ovpn file extension, which can be imported by clients for VPN connection. Next, we will look at how to use the individual security files to configure the client for connection to the VPN server.
Creating .ovpn Configuration File
To create the single .ovpn configuration file, we will use nano text editor. Make a copy of the sample configuration file with the following command:
cp /usr/share/doc/openvpn/examples/sample-config-files/client.conf /tmp/vpn-client1.ovpnObserve that the command creates a copy of the file in the /tmp directory. You can choose to save it in a directory of your choosing.
Open wit file with nano text editor, using the following command:
nano /tmp/vpn-client1.ovpnScroll through the file until you find the following line:
proto udp
This specifies that the connection protocol will be UDP. Ensure the the connection protocol matches that of the VPN server. If the VPN server uses TCP connection, then update it to tcp instead, else leave it unchanged. Mostly, OpenVPN servers use UDP for their connections.
Again, scroll through the file until you find the following line:
remote my-server-1 1194
Replace my-server-1 with the public IP address of the VPN server system. For example:
remote 111.222.333.123 1194
The line also specifies that VPN connections will be done through port 1194. If your VPN server listens on a different port, then replace 1194 with your port number.
Scroll further until you find the following lines:
ca ca.crt
cert client.crt
key client.key
These require the CA certificate, client certificate, as well as client private key. Usually, we will set their values to their respective file names, as they exist on disk. However, since we intend to create a single .ovpn configuration, we will have to dump the contents of the files inline, using XML-like tag syntax.
Update the lines using XML-like tag syntax, such as shown below:
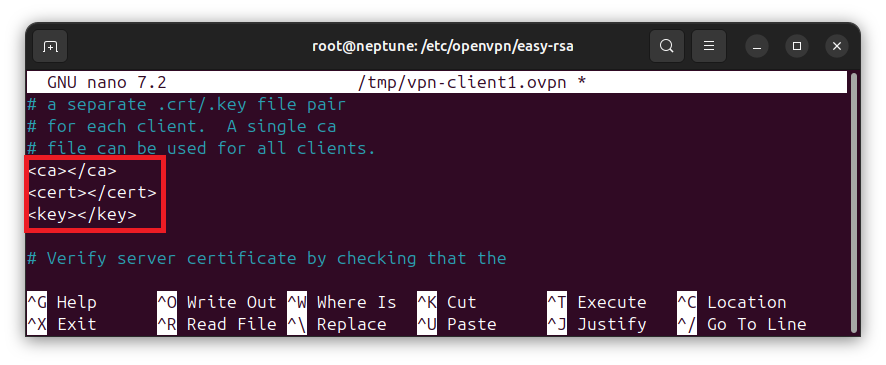
As indicated earlier, we will dump the contents of the files directly between the tags.
CA Certificate
The <ca></ca> tag is used for inline inclusion of the CA certificate. Move your cursor so that it is in the middle of the tags, where its content will be inserted, then press the [Enter] key on your keyboard. The cursor should be at the beginning of the closing tag, as shown below:
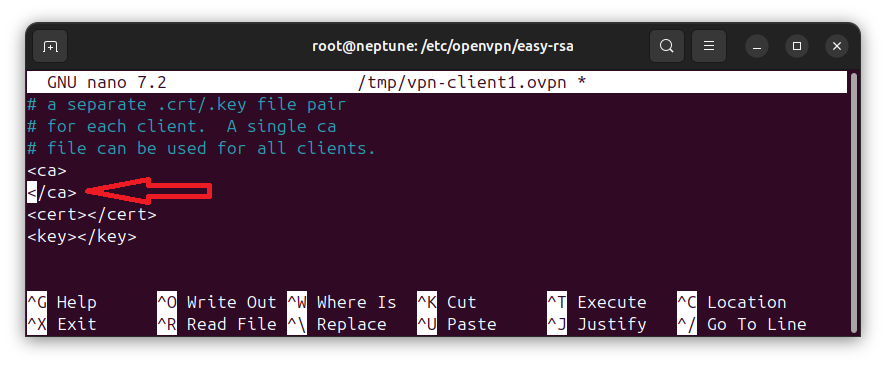
We will execute a command to so that the content of the CA certificate file will be dumped between the <ca></ca> tags. Recall that the CA certificate file was generated with the name ca.cert, and saved in the /etc/openvpn/easy-rsa/pki/ directory.
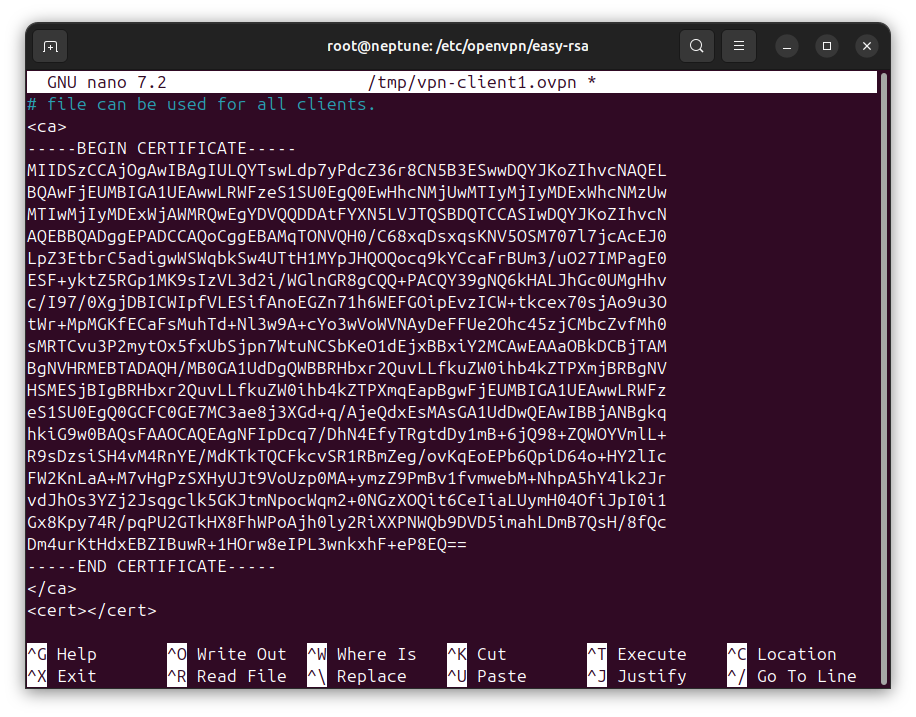
Press Ctrl+T on your keyboard. The nano text editor will be in command execution mode. Type the following command and press the [Enter] key when done.
cat < /etc/openvpn/easy-rsa/pki/ca.crtThis should output the content of CA certificate file, ca.crt, between <ca></ca> tags, as shown below:
Client Certificate
Next, we need to get the content of the issued client certificate and dump it between <cert></cert> tags. The signed client certificate was generated as /etc/openvpn/easy-rsa/pki/VPN_CLIENT_NAME, where VPN_CLIENT_NAME is the name used to generate the client certificate request. In this guide, vpn-client1 was specified, and will be used in the command.
Move your cursor so that it is between <cert></cert> tags, then press the [Enter] key to move to the next line. Press Ctrl+T, to go into command execution mode, then type and execute the following command:
cat < /etc/openvvpn/easy-rsa/pki/issued/vpn-client1.crtAfter executing the command, you will see the content of the issued client certificate within <cert></cert> tag.
Client Private Key
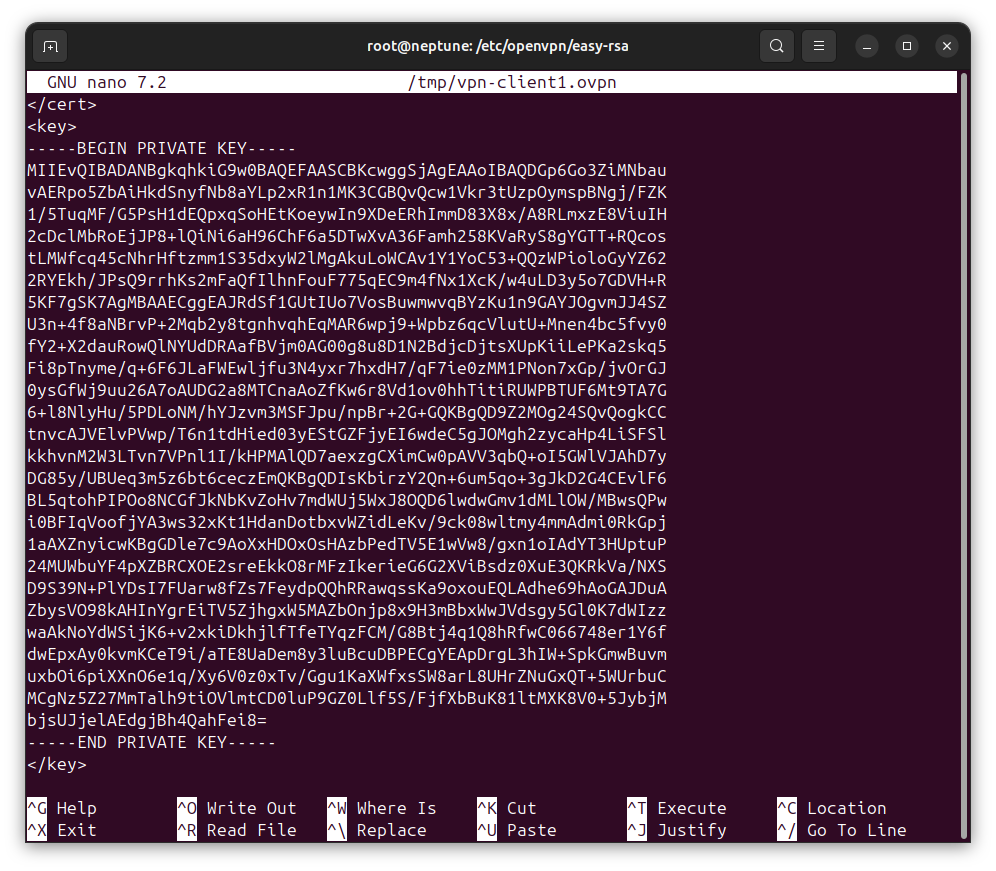
Again, move your cursor between <key></key> tags and press the [Enter] key to move to the next line. Press Ctrl+T to enter into command execution mode. Now, type and execute the following command:
cat < /etc/openvpn/easy-rsa/pki/private/vpn-client1.keyYou should see the content of the client private key dumped between the <key></key> tag. The following is a sample view:
SSL/TLS Authentication Key
Lastly scroll through the file until you see the following line:
;tls-auth ta.key 1
The line requires static SSL/TLS authentication key file. Recall that in this guide, we generated the key as tls-crypt, saved as tc.key. Uncomment the line and update it to the following, using XML-like tag syntax:
<tls-crypt></tls-crypt>
If you generated a tls-auth static key file, then you should replace <tls-crypt></tls-crypt> with <tls-auth></tls-auth>:
<tls-auth></tls-auth>
Move your cursor so that it is between <tls-crypt></tls-crypt>, or <tls-auth></tls-auth> if you generated a tls-auth static file instead.
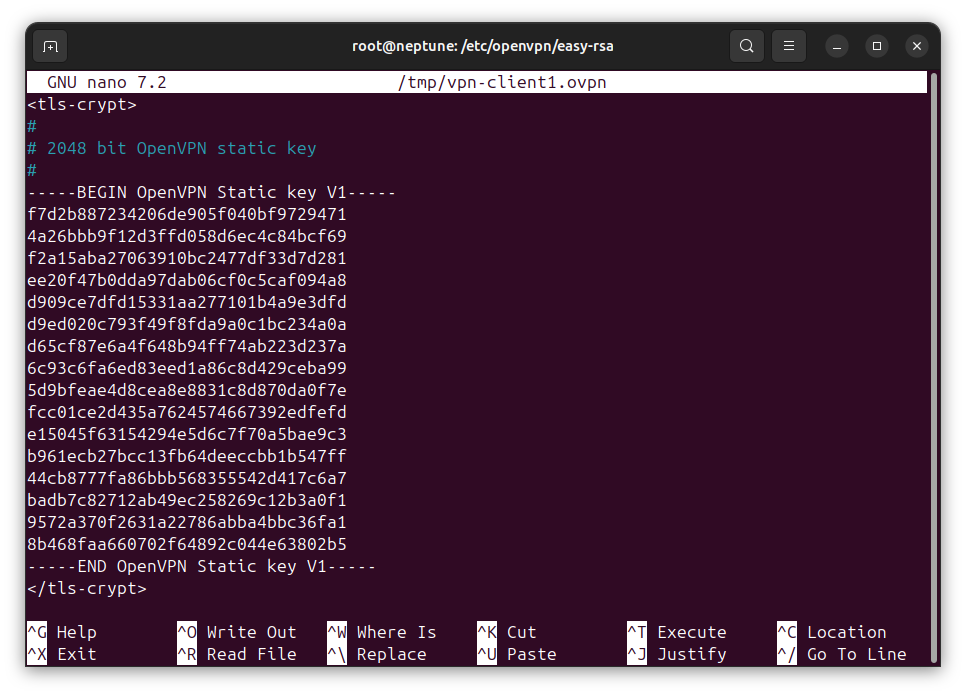
Between the tags, press the [Enter] key to move to the next line, then press Ctrl+T to be in command execution mode. Type and execute the following command, where tc.key is the name of the file generated for the static SSL/TLS authentication key.
cat < /etc/openvpn/easy-rsa/pki/tc.keyIf you used a different name for authentication key file rather than tc.key, then replace tc.key in the command with the name that you used in generating the file.
After executing the command, you should see the content of the static SSL/TLS authentication key file between <tls-crypt></tls-crypt> tag. A sample is shown below:
To save the file press Ctrl+O, then press [Enter] key to save the file.
At this point, you can switch from the root account to your own account. Type and execute the following command, replacing YOUR_ACCOUNT_NAME with your user account name:
sudo su YOUR_ACCOUNT_NAMESince the client configuration file was saved in the /tmp directory, you will need to copy the configuration file to the client machine to avoid losing the file on system reboot.
If you need to keep a copy on the VPN server machine, you can save a copy in your home directory. The following is a sample command, assuming that vpn-client1.ovpn is the client configuration file that was saved in the /tmp directory.
sudo cp /tmp/vpn-client1.ovpn ~/vpn-client1.ovpnImport .ovpn Client Configuration
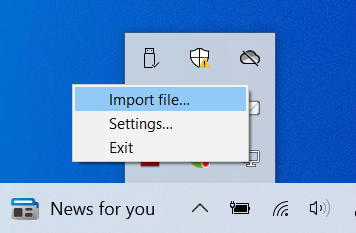
When using OpenVPN GUI client applications, there will be a menu item available to import client configuration files with .ovpn file extension. For example, the following shows a menu item to import .ovpn configuration file from OpenVPN GUI for the Windows operating system.
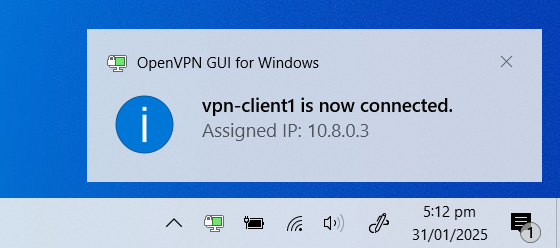
After importing the file, the configuration values will be loaded. From your OpenVPN client application, connect to the VPN server.
The following image shows the the VPN client has successfully connected to the VPN server.
Using OpenVPN Client on Ubuntu Desktop
In this section, we will look at how to configure OpenVPN client running on Ubuntu system to connect to a OpenVPN server. It is assumed that you are
To install OpenVPN on the client system, type and execute the following command:
sudo apt install openvpnCopy the CA certificate, static authentication key, client certificate, and client private key from the VPN server to the client machine. In this guide, the files were generated and saved as follows:
- CA Certificate:
/etc/openvpn/easy-rsa/pki/ca.cert - Static Key:
/etc/openvpn/easy-rsa/pki/tc.key - Client Certificate:
/etc/openvpn/easy-rsa/pki/issued/VPN_CLIENT_NAME.crt - Client Private Key:
/etc/openvpn/easy-rsa/pki/private/VPN_CLIENT_NAME.key
Your installation of OpenVPN on the client system may generate a client directory, /etc/openvpn/client. If this directory does not exist, then create the directory with the following command:
sudo mkdir -p /etc/openvpn/clientThen copy the CA certificate, static key, client certificate and client private key into /etc/openvpn/client/ directory.
The next task is to create the client configuration file. Like the server configuration, OpenVPN has a sample client configuration file. You can make a copy of the sample client configuration file and provide set the values for the client.
Type and execute the following command to create a copy of the sample client configuration file:
sudo cp /usr/share/doc/openvpn/examples/sample-config-files/client.conf /etc/openvpn/client.confThen open the file with nano text editor:
sudo nano /etc/openvpn/client.confScroll through the file until you see the following line:
proto udp
If your VPN server is configured to accept connections with UDP, then leave it unchanged. However, if is configured for TCP connections, then update to tcp instead:
proto tcp
Next, scroll through the file until you see the following line:
remote my-server-1 1194
Replace my-server-1 with the public IP address of the VPN server system. If the VPN server listens on a different port, then replace 1194 with the port number that the VPN server listens.
Keep scrolling until you find the following lines:
ca ca.crt
cert client.crt
key client.key
Set ca to the CA certificate, cert to the client certificate, and key to the client private key. These files were copied to /etc/openvpn/client/ directory earlier:
ca /etc/openvpn/client/ca.crt
cert /etc/openvpn/client/vpn1-client1.crt
key /etc/openvpn/client/vpn1-client.key
Scroll again until you find the following line:
;tls-auth ta.key 1
This requires the static SSL/TLS authentication key. In this guide, we generated a tls-crypt static key rather than tls-auth. This is because tls-crypt is an improvement over tls-auth. Clear the preceding semicolon to uncomment it, then update it from tls-auth to tls-crypt. Set it to the tls-crypt file:
tls-crypt /etc/openvpn/client/tc.key
If you generated tls-auth static key instead, or the VPN server you will be connecting to uses tls-auth static key, then leave it as tls-auth after you uncomment it, and set its value to the tls-auth key file:
Press Ctrl+O, then on [Enter] key to save the file.
To connect to the VPN server, you will run the OpenVPN service using the client configuration that you saved. Type and execute the following command:
sudo systemctl start openvpn@clientTake note of openvpn@client in the command. The @client part indicates the configuration that has to be loaded to connect to the VPN server. If you recall, we named the client configuration file client.conf. If you used a different name for the client configuration file, then replace @client in the command with the name you used for the client configuration file. For example:
sudo systemctl start openvpn@MY_CLIENT_CONFIGYour OpenVPN client should now connect to the VPN server. You can check its status with the following command:
sudo systemctl status openvpn@client
Wrapping Up
In this guide, we have looked at how to install OpenVPN server with Easy-RSA to generate and digitally sign certificates for VPN server authentication.
We also covered how to create a .ovpn client configuration file that can be distributed clients for connection with the VPN server.