phpMyAdmin is a very popular free and open-source PHP application that can be used to manage and administer MySQL/MariaDB databases from a web interface.
It can be used to perform several database tasks such as creating and dropping databases, creating and dropping tables, adding and editing table records, managing keys such as index keys, unique keys, foreign keys, and many other tasks.
Due to its popularity on the web, many attackers attempt to find phpMyAdmin installation paths and target them for intrusion. Although it requires a username and password, attackers usually use brute-force attacks to guess credentials in attempts to gain access to the database. It is therefore important to add another layer of security to the phpMyAdmin installation to strengthen its security.
In this guide, we will look at how to add an extra layer of security to phpMyAdmin installation with HTTP Basic Authentication.
Table of Contents
- Prerequisites
- HTTP Basic Authentication
- Securing phpMyAdmin with HTTP Authentication
- Step 1: Create Password File
- Step 2: Configure Nginx to Password Protect phpMyAdmin
- Conclusion
Prerequisites
This guide assumes that you are using a Ubuntu system, and you have non-root user account that has administrative privileges to install software packages.
It is expected that you have familiarity with basic Linux commands, and you are using Nginx web server.
I assume that you have already installed phpMyAdmin on your Ubuntu system. If you haven’t, then you can do so by reading through my comprehensive guide on how to install phpMyAdmin on Ubuntu with Nginx web server.
HTTP Basic Authentication
HTTP provides an authentication framework that can be used to restrict access to a web resource. To gain access to the resource, clients will be required to complete web request authentication before the resource can be fetched.
For example, a web request for a resource that is password protected will prompt the user to enter a user name and password for access, such as shown below:
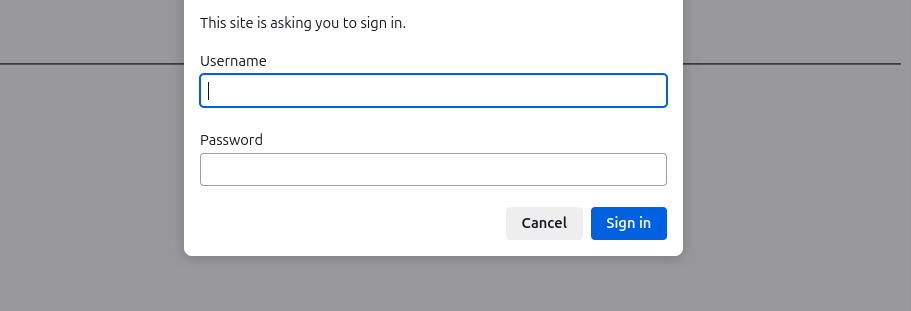
This form of web request authentication is usually referred to as HTTP Basic Authentication.
Since phpMyAdmin installations are accessed through web requests, we can employ this form of web resource access restriction to password protect phpMyAdmin login page. Users who attempt to access phpMyAdmin will be required to complete HTTP Basic Authentication before they are granted access.
Securing phpMyAdmin with HTTP Basic Authentication
To require a user name and password before granting access to phpMyAdmin, the web server needs to know the valid credentials that will pass HTTP Basic Authentication.
Usually, the web server is directed to read from a file that contains the valid user name and hashed password, and it expects the credentials to be in a specific format.
Specifically, the user name and hashed password are expected to be separated by a colon, and stored in the file in following format:
USERNAME:HASHED_PASSWORD
In the remaining sections, we will see how we can generate a hashed password for a user and store them in a file, We will also configure the web server to prompt for the valid user name and password when a user attempts to access phpMyAdmin.
Step 1: Create Password File
To be able to authenticate a user, the web server will be directed to read the valid access credentials from a file. Thus, we need to create the password file and store the valid credentials in the file.
It will be insecure to store the password in its plain form. Rather, we will generate a hash of the password, and store the hashed password in the file.
There are two popular utilities that can be used to generate a hash of a specified password. These are OpenSSL and htpasswd utilities. Any of these two utilities can be used.
The immeiate section looks at how to generate a password hash using OpenSSL. If you are interested in generating a password hash with htpasswd instead, then jump to the section on generating hashed password with htpasswd.
Option 1 – Generate Password Hash with OpenSSL
As indicated earlier, the web server expects the user name and hashed password combinations to be in the following format:
USERNAME:HASHED_PASSWORD
The first thing that can be done is to output the user name into the password file. Once done, we will run openssl passwd command to generate the password hash, and then append to the user name in the password file.
Type the following command to send the user name into the file. You can give the password file a name you prefer:
sudo sh -c "echo -n 'PMA_HTTP_AUTH_USERNAME:' >> /etc/nginx/.http_auth"Replace PMA_HTTP_AUTH_USERNAME with the user name for the HTTP Basic Authentication. You should also take note of the trailing colon (:) after the user name.
The -n option ensures that the echo statement is redirected into the file without a trailing newline character. This is important as we need to append the hashed password to the user name on the same line.
If you omit the -n option to echo, a newline character will be appended and cause the next output to be written on the next line, thus deviating from the expected format.
To generate the password hash with openssl, type and execute the following command:
sudo sh -c "openssl passwd >> /etc/nginx/.http_auth"The output from the openssl passwd command, which is the hashed password, is being redirected to the password file which already contains the user name. The hashed password will be appended to the user name.
The dot (.) character preceding the file name will hide the password file in the /etc/nginx/ directory.
After executing the command, you will be prompted for the password, such as shown below:

Type the password and press the [Enter] key. You will be prompted to re-enter the password. Confirm by typing the password again, then press the [Enter] key.
The password hash will be appended to the user name in the password file. To see the contents of the password file, run the following command:
sudo nano /etc/nginx/.http_authYou should see the user name and password hash in the file. An example is shown below:
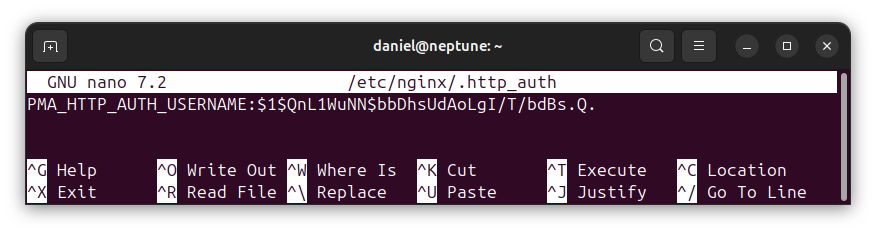
As expected, we have the user name and hashed password combinations stored in the required format:
USERNAME:HASHED_PASSWORD
The Nginx web server will be able to read them to authenticate a user that attempts to access the protected resource, such as phpMyAdmin.
With the password file ready, you can now proceed to configure Nginx to password protect phpMyAdmin with HTTP Basic Authentication.
Option 2 – Generate Password Hash with htpasswd
Another package utility that can be used to generate a password hash is the htpasswd utility. To use it, you will need to install the apache-utils package:
sudo apt install apache-utilsTo generate a password hash for a user, type and execute the following command:
sudo htpasswd -c /etc/nginx/.http_auth PMA_HTTP_AUTH_USERNAMEThe -c option is an indication to create the password file. If the file already exists, it will be re-created, and any existing content will be lost. Therefore, you should only use the -c option when the file does not already exist with user credentials. If you already have a password file with existing content, then omit the -c option.
The dot (.) character preceding the file name, .http_auth, implies that the password file should be created as a hidden file.
After executing the command, you will be asked to enter the password for the specified user name. A sample view is shown below:

Enter the password for the user and press the [Enter] key. You will be asked to re-enter the password. Enter the password again and press the [Enter] key.
The user name and hashed password combinations will now be available in the password file. You can view the contents of the file with the following command to confirm:
sudo nano /etc/nginx/.http_authThe content of the file should be similar to the following:
Step 2: Configure Nginx to Password Protect phpMyAdmin
The next step, after creating the password file with access credentials, is to configure the Nginx web server to prompt for username and password when a user attempts to access the phpMyAdmin page. The configuration is done in the Nginx server block in which phpMyAdmin is served.
As discussed in phpMyAdmin browser access configuration with Nginx, the web server can be configured to launch phpMyAdmin with a dedicated domain or with a path name. This determines the appropriate location to enter the directives for HTTP Basic Authentication.
phpMyAdmin Access with Dedicated Domain
If phpMyAdmin is configured to launch with a dedicated domain or sub-domain, such as the following:
https://pma.exmaple.com
then you will enter the HTTP Basic Authentication directives at the server level. Suppose you have the following Nginx server block configuration for phpMyAdmin:
server {
    server_name pma.example.com;
    root /path_to_phpmyadmin;
    index index.php index.html;

    # other directives follow
}
You will add the HTTP Basic Authentication directives at the server block level:
server {
    server_name pma.example.com;
    root /path/to/phpmyadmin;
    index index.php index.html;

    # these lines will trigger a prompt for authentication
    auth_basic "Restricted";
    auth_basic_user_file /etc/nginx/.http_auth;

    # other directives follow
}
Line 7 is the directive that signals that HTTP Basic Authentication is required for accessing resources at the server. Line 8 tells Nginx web server the location of the password file from which it will find the valid credentials.
As can be seen, the directives have been entered at the server block but not in a location block.
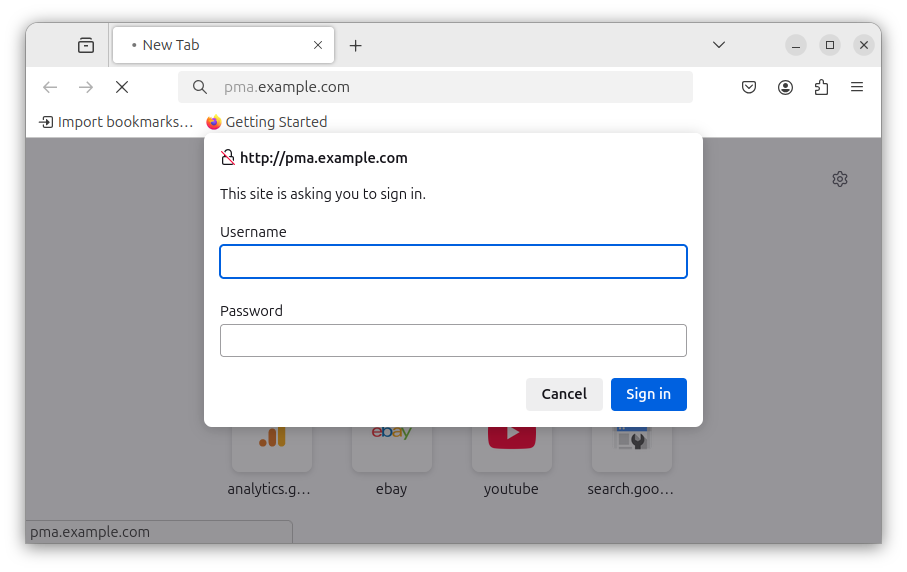
Save the file and then reload the Nginx configurations:
sudo systemctl reload nginxIf you attempt to access the domain in your web browser, you will be prompted to enter a username and password before access to the phpMyAdmin can be granted:
If you fail to provide the correct credentials, or you enter wrong credentials, the web server will inform you that authorization is required to access the requested resource:

phpMyAdmin Access with Path Name
If phpMyAdmin is configured to launch with a path name in a URL, such as the following:
https://example.com/pma_path
then it will be appropriate to enter the HTTP Basic Authentication directives in a location block within the server block configuration.
Given that phpMyAdmin can be accessed with the path name /pma_path for the domain mywebsite.com, and with the following server block configuration:
server {
    server_name mywebsite.com;
    root /path/to/app;
    index index.php index.html;

    # other directives follow
}
you will need to define a location block within which you will enter the HTTP Basic Authentication directives. For example:
server {
    server_name mywebsite.com;
    root /path/to/app;
    index index.php index.html;

    location ^ ~/pma_path {
        # these lines will trigger a prompt for authentication
        auth_basic "Restricted";
        auth_basic_user_file /etc/nginx/.http_auth;
    }

    # other directives follow
}
This ensures that the user will be prompted to complete HTTP Basic Authentication only when the path that launches phpMyAdmin, /pma_path, is being accessed. Other resources or paths in the server block will not be affected.
Save the server block configuration and close the file, then test the Nginx configurations by running the following command:
sudo nginx -tIf the test is successful, reload the configurations with the following command:
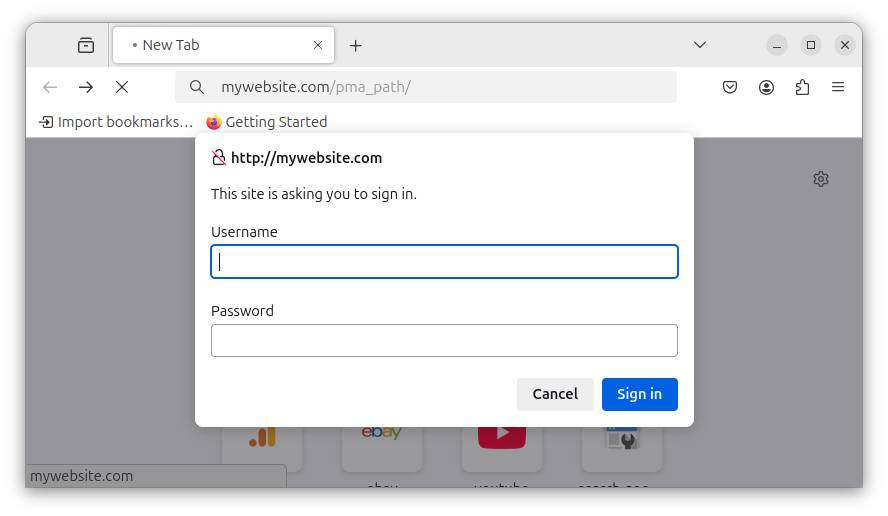
sudo systemctl reload nginxNow go ahead and access phpMyAdmin with the path name in the URL. For example:
http://example.com/pma_path
Remember to replace pma_path with the URL path with which you access phpMyAdmin.
You should now be welcomed with a prompt to enter the username and password for accessing phpMyAdmin:
Conclusion
In this guide, we have looked at how to secure phpMyAdmin with HTTP Basic Authentication. This requires that users provide valid credentials before the Nginx web server fetches resources for displaying the phpMyAdmin page.
To provide the web server with the correct credentials, a password file needs to be created with the valid user name and password. The server block configuration that serves phpMyAdmin is then configured to prompt for the user name and password before it is launched.