phpMyAdmin is a very popular free and open-source graphical user interface (GUI) web application that is used to manage MySQL and MariaDB databases. It is written in the PHP programming language.
In this guide, we will look at how to install phpMyAdmin on a Ubuntu system running nginx web server. We will further explore how we can configure the web server so that we can launch phpMyAdmin using a dedicated domain or a path name.
If you are running apache web server, you will need to read through the guide on how to install phpMyAdmin on Ubuntu with apache web server.
Prerequisites
To get along with the discussions in this guide, it is expected that you pass the following requirements:
- Running Ubuntu: You are running Ubuntu 24.04 server, or any other compatible version of Ubuntu. If you are running Ubuntu 22.04 or Ubuntu 20.04, your journey through this guide will most likely be successful.
- Running Nginx: Since phpMyAdmin runs in a web browser, it is expected that you have a web server application installed and running. In this guide, it is assumed that you are running nginx web server. If you are running apache web server instead, then you will need to read through the guide on installing phpMyAmin on Ubuntu with apache.
- PHP and PHP-FPM Installed: It is assumed that you already have PHP and PHP-FPM installed on your Ubuntu system. If you do not have PHP and or PHP-FPM installed, you will need to follow the discussion on how to install PHP 8.4 on Ubuntu 24.04. In this guide, we will use php8.4 and php8.4-fpm for the examples. If you are running a previous version of PHP, that will also work fine.
- MySQL/MariaDB Installed: It is assumed that you have MySQL or MariaDB database server installed and running.
Step 1: Download phpMyAdmin
Yes, I know. phpMyAdmin is available in the default Ubuntu repository, and we can issue an apt command to install it. However, we will install the latest version by downloading it from the official website. As you will soon see, it is a very simple and uncomplicated task.
Installing phpMyAdmin from the Ubuntu repository can have its own challenges, at times. Prominent issues may include the following:
- You may encounter errors with phpMyAdmin when you perform certain updates or upgrade your Ubuntu system.
- The version of phpMyAdmin in the Ubuntu repository may not be immediately updated to the latest version released at the official website.
phpMyAdmin is mostly targeted by intruders who attempt to gain access to the database. Installing the latest release from the official website ensures that we have the latest version installed, especially releases with security fixes.
To download and install the latest version, visit the official phpMyAdmin download page and note down the version number of the latest release:

From the above image, we can identify that the latest release is version 5.2.1. This is the latest release at the time of writing. We will need the version number of this release in a later command to complete the download.
In the command that follows, we download the latest version of phpMyAdmin. You will need to replace the version number you noted down from the official website with the version number in the command.
Type and execute the following command to download phpMyAdmin:
wget https://files.phpmyadmin.net/phpMyAdmin/5.2.1/phpMyAdmin-5.2.1-all-languages.zipIf you are interested in the english only downloadable file, replace all-languages in the file name with english. In that case, the file name will be phpMyAdmin-5.2.1-english.zip, as used in the following command:
wget https://files.phpmyadmin.net/phpMyAdmin/5.2.1/phpMyAdmin-5.2.1-english.zipIn the the section that follows, in which we extract the downloaded file, it is assumed that you have downloaded phpMyAdmin with all-languages. If you downloaded the english only file, then you should replace all-languages with english in the file name or the name of the directory that gets created after we unzip the file.
Step 2: Extract Downloaded File
The file that we downloaded is a zip file, and we need to unzip it. If you do not have the unzip application installed, then execute the following command to install it:
sudo apt install unzipNow, type and execute the following command to extract the downloaded zip file. Again, it is assumed that you downloaded the file with support for all languages. That is, phpMyAdmin-5.2.1-all-languages.zip:
unzip phpMyAdmin-5.2.1-all-languages.zipThe above command will extract the file into a directory with the same name as the downloaded zip file.
When phpMyAdmin is installed from the default Ubuntu repository, it gets installed in /usr/share/ directory. We can move the extracted files into this same directory, and then rename the directory that contains the application files as phpmyadmin.
Type and execute the following command to move the extracted phpMyAdmin files to /usr/share/ directory:
sudo mv phpMyAdmin-5.2.1-all-languages /usr/share/phpmyadminFor security reasons, it will be appropriate to change the owner of /usr/share/phpmyadmin directory to the web server’s user (www-data). Type and execute the following command to do this:
sudo chown -R www-data:www-data /usr/share/phpmyadminWe now have the latest version of phpMyAdmin installed in /usr/share/ directory, the same location where it would be installed if we issued the command to install it from the Ubuntu repository. Our little effort has paid off with the assurance of the latest release.
Step 3: Install PHP Extensions
phpMyAdmin application files are written in PHP, and it is expected that you already have PHP installed on your Ubuntu system. In this guide, we will use PHP 8.4 for the examples. Additionally, we will configure the web server to pass PHP scripts for processing using PHP-FPM. We will also install other required PHP extensions.
Since the examples in this guide assume the installation of PHP 8.4, we will need to install PHP extensions for this PHP version. If you are using a different version of PHP, replace 8.4 with the version number of PHP that you have installed.
From the command interface, type and execute the command that follows: Remember to replace php8.4 with the version of your installed PHP:
sudo apt install php8.4-{fpm,mysqli,mbstring,zip,gd,json,curl}If you have not already installed php8.4-fpm, the above command will install it as well.
Like nginx, PHP-FPM runs as a service. To ensure that it automatically starts on boot, we will run the following command:
sudo systemctl enable php8.4-fpmWe can check the status of PHP-FPM process by running the following command:
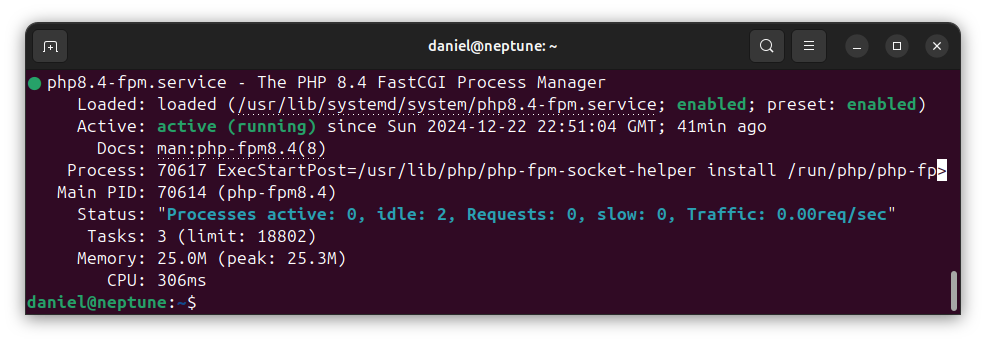
sudo systemctl status php8.4-fpmThe following image is a sample status output for PHP-FPM:

Step 4: Configure Browser Access
phpMyAdmin can be launched by accessing it from a web browser using a path name or a dedicated domain, usually a sub-domain. For example, we can create a symbolic link so that when a path name, such as /pma_path_name is specified in a URL, the phpMyAdmin application will be launched. Alternatively, we can launch it by entering a domain.
https://example.com/pma_path_name
https://pma.example.com.
When using a path name, it is important to use a name that will be difficult to be figured out by attackers. Some attackers scan path names such as /phpmyadmin, /pma, and other common path names related to phpMyAdmin in brute-force attacks to gain access to the database. In this guide, I will use the path name /pma_path for the examples. You will need to replace this path name with a name of your own preference.
In the next discussions, we will look at how we can create a symbolic link to create a path that we can use to launch phpMyAdmin in a web browser. We will also look at how we can configure nginx web server so that we can access phpMyAdmin from the web browser.
If you are using apache web server, you will need to read through the guide on installing phpMyAdmin on Ubuntu with Apache web server.
4.1: phpMyAdmin Access with Path Name
Accessing phpMyAdmin with a path name in a URL is very simple. This only requires that we create a symbolic link, or a shortcut, to the phpMyAdmin installation directory.
For example, if we have a domain such as example.com, we can access phpMyAdmin with the path /pma_path, as shown below:
http://example.com/pma_path
In this example, we will create the symbolic link in the default nginx website directory, /var/www/html/. First, we need to be sure that the default website is configured to execute PHP files.
Type and execute the following command to open the configuration file for the default nginx server block:
sudo nano /etc/nginx/sites-available/defaultScroll into the server block section until you see the following lines:
index index.html index.htm index.nginx-debian.html;If index.php is not specified in the index files specification, add it as the first item, as seen below:
# Add index.php to the list if you are using PHP
index index.php index.html index.htm index.nginx-debian.html;
If the server block isn’t already configured to execute PHP files, then add the following lines:
location ~ \.php$ {
    include snippets/fastcgi-php.conf;
    fastcgi_pass unix:/run/php/php8.4-fpm.sock;
}
It can be observed from line 3 that we are using php8.4-fpm. If you are not using PHP 8.4, replace the version number, 8.4, in php8.4-fpm.sock with the version number of your installed PHP. Save the file and exit the editor.
Test nginx configurations by executing the following command:
sudo nginx -tIf the test is successful, then reload the nginx configurations by executing the following command:
sudo systemctl reload nginxThe last step is to create the symbolic link to the phpMyAdmin installation directory. Recall that the nginx default website configuration, which we edited, points to /var/www/html/ directory. We will therefore create the symbolic link to phpMyAdmin installation directory in /var/www/html directory.
Type and execute the following command to create the symbolic link:
sudo ln -s /usr/share/phpmyadmin/ /var/www/htmlThe above command will create the directory name phpmyadmin in /var/www/html directory. Let’s list the contents of /var/www/html directory to confirm:
sudo ls -l /var/www/htmlYou should see the contents of the directory in long list form:

You can also see that the directory name phpmyadmin links to /usr/share/phpmyadmin/ directory. Earlier, we indicated that this is a common path name that attackers may scan to get access to phpMyAdmin in brute-force attacks. We need to change this directory name, (the link), to an unusual name. In this guide, I will use the path name pma_path. You should replace this name with your preferred name.
Type and execute the following command to rename the directory, (the link):
sudo mv /var/www/html/phpmyadmin /var/www/html/pma_pathAgain, let’s see the content of /var/www/html directory:
sudo ls -l /var/www/htmlWe can verify the change in the directory name from the output below:

With the change in the directory name, we can now use the path name /pma_path to launch phpMyAdmin.
If you have an IP address assigned to your Ubuntu system, or a domain with its document root set to /var/www/html, then type the following in your browser’s address bar:
http://IP_ADDRESS/pma_path
http://DOMAIN.TLD/pma_path
If no IP address or domain is assigned to your Ubuntu system, replace IP_ADDRESS or DOMAIN.TLD with localhost:
http://localhost/pma_path
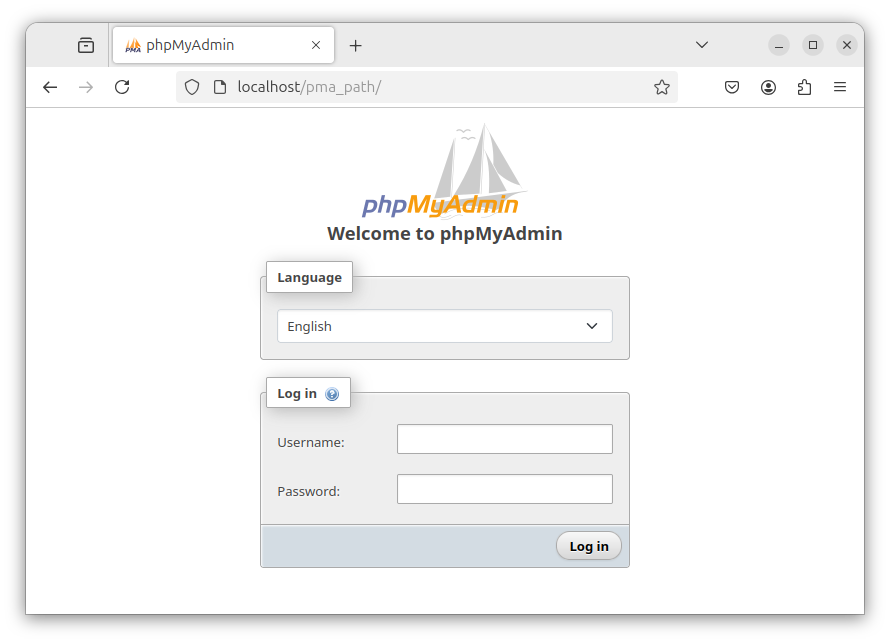
You should now see phpMyAdmin login page displayed in your browser. The following is a sample view:

4.2: phpMyAdmin Access with Domain
We can create a configuration for phpMyAdmin so that we can access it using a dedicated top-level domain or a sub-domain. For example, we may wish to launch phpMyAdmin with a URL such as https://pma.example.com. We can do this by creating a server block configuration for the domain.
In nginx, we can create a server block configuration file in either of two directories:
/etc/nginx/conf.d//etc/nginx/sites-available/
If we create the configuration file in /etc/nginx/conf.d/, we are not required to explicitly enable the website configuration. However, we will need to ensure that the configuration file ends in .conf file extension.
If we create the configuration file in /etc/nginx/sites-available/ instead, we are required to explicitly enable the website configuration. This is done by creating a symbolic link to the configuration file in /etc/nginx/sites-enabled/ directory.
Let’s choose to create the server block configuration file in /etc/nginx/conf.d/ directory. In this example, we will name the server block configuration file phpmyadmin.conf.
From the command interface, type and execute the following command:
sudo nano /etc/nginx/conf.d/phpmyadmin.confIn the text editor, type or paste the following server block configuration code, replacing pma.example.com on line 4 with your own domain or sub-domain:
server {
    listen 80;
    listen [::]:80;
    server_name pma.example.com;
    root /usr/share/phpmyadmin;
    index index.php index.html;

    access_log /var/log/nginx/pma_access.log;
    error_log /var/log/nginx/pma_error.log;

    location / {
        try_files $uri $uri/ =404;
    }

    location ~ \.php$ {
        include snippets/fastcgi-php.conf;
        fastcgi_pass unix:/run/php/php8.4-fpm.sock;
    }
}
Line 4 defines the domain which this server block configuration applies. On line 5, we indicate the root directory that contains the phpMyAdmin application files.
Take a careful look at line 17. We are using php8.4 to execute PHP files. If you are using a different version of PHP, then replace 8.4 in php8.4-fpm.sock with the version number of PHP that you are using. For example, if you are using PHP 8.3, then replace php8.4-fpm.sock with php8.3-fpm.sock;
If you are new to nginx server block configuration, see the discussion on setting up nginx server block configuration for more details.
Save and close the text editor. If you are using nano text editor, press Ctrl+O, then on [Enter] key to write the content to the file. Press Ctrl+X to exit the editor.
It is always a good idea to check for errors after creating or modifying nginx configuration files. Type and execute the following command to test for nginx configuration errors:
sudo nginx -tThe -t option informs nginx to test the configuration files. If no errors are detected, nginx will give us a positive feedback:

We will need to reload nginx configurations for the changes to take effect. Type and execute the following command:
sudo systemctl reload nginxYou can now access phpMyAdmin using the domain that you used in the configuration. In your browser’s address bar, type the following, replacing pma.example.com with your own domain or sub-domain used in the configuration:
http://pma.example.com
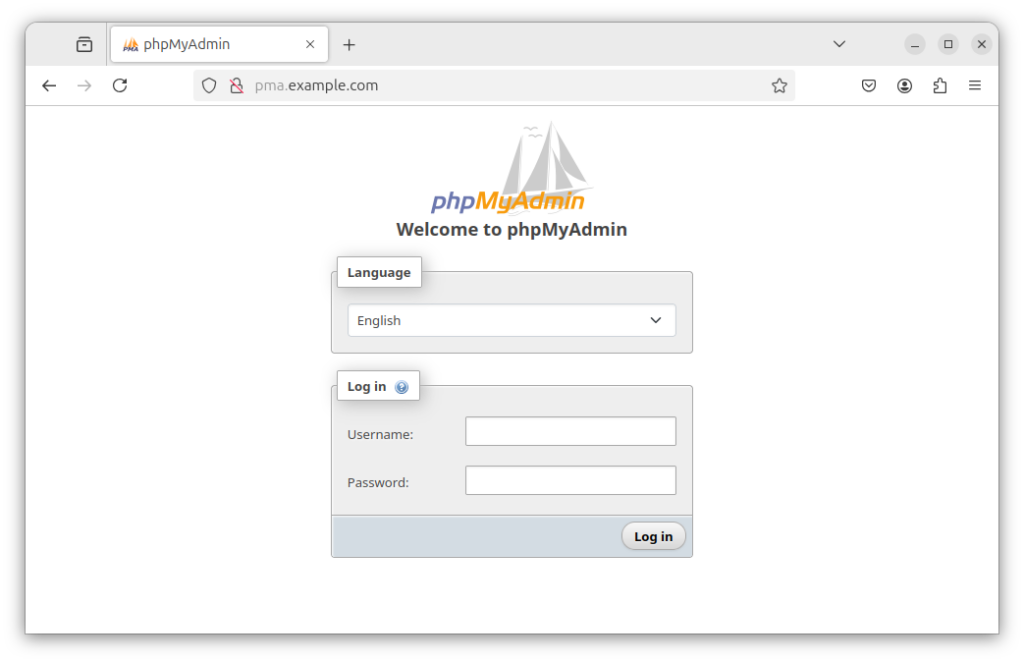
You should see phpMyAdmin launched in the browser window, such as shown below:

Securing phpMyAdmin
Some attackers scan website URL paths and domains to get access to phpMyAdmin installations. It is therefore very important to secure phpMyAdmin after install.
A very common security measure is the HTTP Authentication which requires a username and password to gain access to a web resource. We can use this technique to restrict access to the phpMyAdmin login page.
Conclusion
phpMyAdmin is a very popular web application that is used to manage MySQL and MariaDB databases. It is written in the PHP programming language and runs in a web browser.
In this guide, we have looked at how to install phpMyAdmin on a Ubuntu system running nginx web server. We also explored how to configure the web server to launch phpMyAdmin with a dedicated domain.
To launch phpMyAdmin using a path name, we explored how to create a symbolic link to the phpMyAdmin installation on a Ubuntu system.